Have you ever tried to make something cool with infusible ink using just an iron? It’s like trying to teach a cat to do tricks – frustrating and not the best idea.
For successful results with infusible ink, you’ll need a specific level of heat and consistency that your typical iron may not be able to provide. Here’s a guide on why, and more importantly, what you can do about it.
Can You Use an Iron for Infusible Ink?
To some extent.
But let me share some insights into why it might not be the best choice for achieving those vibrant, professional-looking results with your infusible ink projects.
1. Temperature Troubles:
Using a regular household iron might seem tempting.
But here’s the catch:
Infusible ink loves heat, and your typical iron might not quite cut it.
Sublimation magic happens at temperatures above 350°.
And your iron might struggle to reach that sweet spot.
Think of it like trying to bake cookies in a lukewarm oven.
They just won’t turn out as scrumptious.
2. Time Is of the Essence:
Picture this: you’re ironing away, waiting for that mesmerizing ink infusion.
But alas, the heat variance in a common iron can slow down the process.
With infusible ink, the transfer may become patchy because of this variance.
3. Size Matters:
Your trusty iron has a limited surface area.
If your design exceeds the iron’s heat plate, you’ll find yourself doing a lot of lift-and-place work.
It’s annoying and may create an uneven appearance.
Not what you want for your infusible ink masterpiece.
4. Steam Vents:
The steam vents of a household iron interrupt the heat flow from the iron’s plate.
They may also cause uneven transfers.
The vents can create a chaotic pattern on the otherwise flat-colored areas of the design.
5. Curved Surface Challenge:
Hats, mugs, and tumblers are all curved surfaces.
Using an iron on them is pretty much impossible.
That’s because you can’t achieve even pressure with it.
You will need a mug or hat press for that.
What to use instead of iron with infusible ink?
If you’re serious about infusible ink adventures, consider investing in a heat press machine.

Even better if it’s the trusty Cricut EasyPress, which is pre-calibrated for Cricut infusible ink.
It’s like upgrading from a compact car to a deluxe model – smoother rides, better results.
And don’t forget the mug or hat press for those curvaceous creations!
Using a heat press instead of an iron for infusible ink
I prefer using the Cricut EasyPress heat press for my infusible ink projects.
Here’s why:
1. Precision Temperature Control:
The EasyPress lets you set the exact temperature needed for infusible ink perfection.
A standard iron that might play temperature roulette.
But the EasyPress ensures your project gets the precise heat treatment it deserves.
It will have just the right temperature for the correct transfer process.
2. Even Heat Distribution:
The EasyPress can spread heat across every inch of your design on a blank.
No hotspots, no steam vents, and no uneven transfers.
3. Foolproof Timer:
Crafting shouldn’t be a guessing game.
With the EasyPress, there’s a built-in timer that takes the uncertainty out of the equation.
Set the duration, let the countdown begin, and lift the press when the spotlight is just right.
Your infusible ink project will thank you for its flawless performance.
4. Convenience Meets Consistency:
This machine is compact, stylish, and super-convenient.
No need for elaborate setups or complicated maneuvers.
The EasyPress is designed for simplicity, ensuring that your crafting experience is as smooth as the results it delivers.
5. Versatility Unleashed:
Whether you’re tackling T-shirts, tote bags, or any infusible ink adventure, the EasyPress is your versatile companion.
Its adaptability means you can conquer a variety of projects with ease, making it the go-to choice for the multifaceted crafter in you.
6. Crafting on the Go:
The EasyPress isn’t bound by the confines of your crafting space.
It’s portable, lightweight, and ready to accompany you on your creative escapades.
Whether you’re at a crafting workshop or just moving your masterpiece from room to room, the EasyPress is always ready to shine.
Materials Needed:
1. Cricut Infusible Ink Transfer Sheets or Pens:
Choose your favorite vibrant colors and patterns for the design you have in mind.
2. Cricut Blanks:
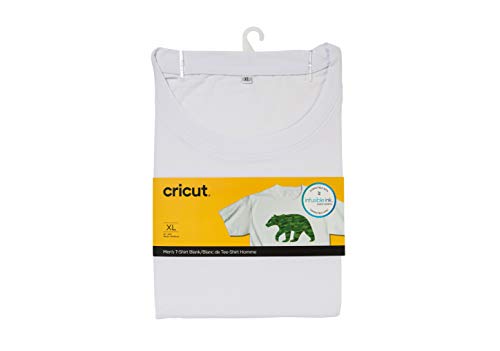
Select compatible surfaces such as T-shirts, tote bags, or coasters designed for use with infusible ink.
3. Cricut Machine:
Use any Cricut machine to cut your design from an ink sheet or draw it with infusible ink pens and markers on a sheet of laser copy paper.
4. Cricut EasyPress:
This is your crafting tool for applying precise heat to bring your infusible ink creations to life.
5. Cricut EasyPress Mat:

Provides a stable and heat-resistant surface for your crafting endeavors.
6. Lint Roller:
Ensure your blanks are free of any lint or debris before applying the infusible ink.
7. Card Stock and Butcher Paper:
Create a protective barrier between your EasyPress and the project surface with butcher paper.
This will prevent any ink staining of the heat press plate.
Plus, insert card stock between the front and the back of a shirt or tote bag.
This will prevent unwanted ink transfer to the back of your blank.
8. Heat-Resistant Tape:
Secure your infusible ink design in place to avoid shifting during the transfer process.
Step-by-Step Instructions:
Step 1: Design Creation
Use your Cricut machine and software to create or choose a design.
Adjust the size to fit your chosen blank.
Step 2: Material Preparation
Make sure your blank surface is clean and free of lint.
Use a lint roller to remove any debris.
Step 3: Cutting and Weeding
Cut your infusible ink design using your Cricut machine.
Weed out the excess material, leaving only the design you want to transfer.
Step 4: Placement and Taping
Position your design on the blank surface.
Use heat-resistant tape to secure it in place.
This will make sure it doesn’t shift during the transfer process.
Step 5: Preheat the EasyPress and Blank
Set your EasyPress to the recommended temperature for infusible ink.
Then preheat both the EasyPress and the blank surface.
Step 6: Cover with Protective Material
Place a sheet of butcher paper on top of your design and blank.
This protects your EasyPress plate from any potential ink transfer.
Step 7: Pressing Time
Lay the preheated EasyPress on top of the protective material.
Follow the recommended time for your specific infusible ink and blank.
Step 8: Cool Down
Allow the project to cool before removing the protective material.
Step 9: Peel and Admire
Carefully peel off the transfer sheet or laser copy paper sheet.
This will reveal your vibrant, professional-looking infusible ink design on the blank.
How to use an Iron with Infusible Ink
So, you’ve got your heart set on infusible ink, but the trusty iron is calling your name?
This is still possible.
Here are some tips:
1. Size Matters – Keep It Small and Simple:
Opt for a smaller canvas, like a coaster or a petite ceramic tile.
Your iron’s plate has its limits, and smaller designs ensure a snug fit under it.
2. Flat Blanks:

Your iron works best on a flat surface.
Choose items that don’t have curves. Don’t use it on baseball hats, mugs, tumblers, etc.
Also, the smoother the surface is, the better.
Think coasters, tiles, or flat areas on a shirt.
3. Polyester Content:
Use polyester-coated sublimation blanks or high-polyester-count shirts.
These materials are like the best friends of infusible ink, creating a strong bond.
4. Use Butcher Paper:
Cover your design with butcher paper when pressing with the iron.
It will protect the iron’s plate and the blank.
Plus, it will distribute the heat more evenly.
Opt for uncoated, plain white butcher paper.
Avoid colored or waxed butcher paper to prevent unwanted color or residue transfer.
5. No Steam:
Never use the iron’s steam setting when working with infusible ink.
Moisture can hinder the ink from bonding with your project, leading to less-than-ideal results.
Stick to the dry setting.
6. Use the Cotton Setting:
Use the cotton setting on your iron. It provides high heat up to 400 °F.
This temperature will help your infusible ink bond with the blank.
7. How to Press:
Press your iron against the design with light, even pressure. Do it gently.
Take your time, and press for about 20–50 seconds each round.
8. Use a well-functioning new iron
Your iron should be in good shape.
Ensure it’s clean, free from rust, and can maintain a consistent temperature.
Can I use any iron for infusible ink, or does it have to be a specific type?
While you can use a regular household iron, it’s crucial to consider its temperature capabilities.
Infusible ink works with higher temperatures, so be sure your iron can reach at least 350 °F for optimal results.
Can I use regular paper instead of butcher paper to cover the design when pressing?
It’s a no-go for regular paper.
Butcher paper is heat-resistant, protecting your design without catching fire.
Regular paper might not handle the heat, and we don’t want any crafting casualties.
Can I iron infusible ink on both sides of the material to ensure the design is fully infused?
It’s a one-sided affair. Infusible ink bonds with the material on a molecular level, ensuring a permanent and vibrant design.
Pressing on both sides may not yield better results and could potentially damage your project.
Final thoughts
To wrap up, you can use an iron with infusible ink. But only on limited projects. They must be small, flat, and your iron must create high heat without steam.
The best way to work with infusible ink is by transferring it with a heat press or mug press. These units will create the high heat and pressure needed for the ink to turn to gas and bond with the blank. Plus, they will distribute the heat evenly.