Wondering, can you use removable vinyl on shirts, but afraid it won’t stay?
In this post I’ll guide you through all the ways you can use removable vinyl on shirts. Plus, I’ll unravel some alternatives that not only endure the wash but also keep your designs intact. Let’s dive right in!
Can you use removable vinyl for shirts?
Yes, you can use removable vinyl on shirts!
However, it has its limitations.
It’s a great option for only adding a temporary creative touch to your clothing.
But this vinyl will not survive the wash.
Let me share some insights to help you decide if it’s the right choice for your project.
Use It for Short-Term Designs
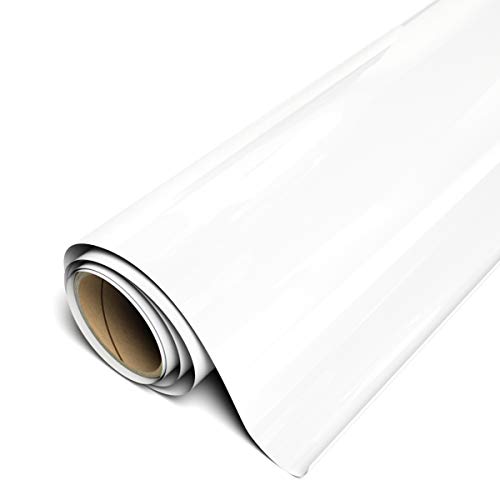
The key feature of removable vinyl is that, as the name suggests, it can be easily removed without leaving a sticky residue behind.
Removable vinyl works like a charm for short-term applications.
Think of one-day events, like birthdays or sports games.
It’s like a temporary tattoo for your shirt. It will add a pop of fun without any long-term commitment.
So it’s an excellent choice for promotional events, trade shows, or branding purposes on shirts. For occasions when you need short-term designs that can be discarded later.
This vinyl goes off without leaving any sticky residue.
So next time you can make a new decal and stick it to your garment for one wear.
How Long Does Removable Vinyl Last on Shirts?
Quality removable vinyl, when applied correctly to a smooth, hard surface, can stay put for up to two years.
However, it won’t stay on shirt fabric for too long.
This type of vinyl can only last up to the first wash.
It will peel after contact with water and detergent.
So you’ll only be able to use it on shirts for a day or two.
The Durable Alternative to Removable Vinyl for Shirts
If you’re looking for a more lasting and durable option, especially for shirts that will endure a laundry routine, then consider iron-on Heat Transfer Vinyl (HTV).
This vinyl is the best one for fabric blanks.
It’s designed to withstand the test of time, sticking around through countless washes.
So, there you have it.
Removable vinyl can definitely make your shirt stand out, but it’s best suited for short-term, non-washing situations.
If you’re in it for the long haul, HTV might be your shirt’s best friend.
Overview of Removable Vinyl
Removable vinyl is versatile, dynamic, and ready to transform surfaces with a touch of creativity.
Picture it as a temporary tattoo for your belongings, sticking around long enough to make a statement and gracefully bowing out when it’s time for a change.
Key Traits:
1. Adhesive:
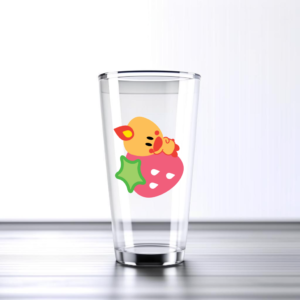
Removable vinyl is incredibly versatile, thanks to its adhesive backing that easily sticks to a wide range of surfaces. It works particularly well on smooth and hard materials, such as glass and plastic, among others.
It’s your artistic ally for quick, customizable enhancements.
2. Short-Term Stickiness:
Removable vinyl excels in short-term projects.
Think stickers, decals for birthdays, events, temporary wall decorations.
3. No Residue:
The beauty of removable vinyl lies in its name.
It peels off without a trace, leaving your surfaces pristine and ready for the next project.
4. Crafting Freedom:
This vinyl can be applied to walls, laptops, party decor, etc.
So it’s pretty versatile.
Removable vs HTV vinyl for shirts
If you want to customize your T-shirt with vinyl, choosing between removable vinyl and HTV vinyl boils down to your design goals and preferences.
Here are the differences:
1. Durability:
Removable Vinyl: Perfect for short-term flair, removable vinyl adds a playful touch but won’t withstand washing or extended wear.
HTV Vinyl: HTV is your go-to for lasting designs on fabric that can handle countless cycles in the washing machine.
2. Application Process:
Removable Vinyl: Quick and easy, like putting on a sticker. Ideal for those impromptu shirt transformations with minimal effort.
Removable vinyl has adhesive backing, and it sticks to surfaces on contact. It’s not activated by heat, making it easy to reposition and remove without leaving residue.
HTV Vinyl: Requires more effort with heat press or iron application.
When you apply heat to HTV, it activates the adhesive, allowing it to bond permanently with the fabric.
It’s a full-scale DIY project, ensuring your design becomes a permanent part of the fabric.
3. Versatility:
Removable Vinyl: Adheres to various surfaces like glass, plastic and metal. Great for versatile indoor projects.
HTV Vinyl: Specialized for fabrics. But you can also apply it to some other surfaces that won’t get damaged with heat. Your go-to choice when you want to dress up your wardrobe or textile home decor items.
4. Removability:
Removable Vinyl: True to its name, it peels off effortlessly when you’re ready for a change.
HTV Vinyl: HTV is highly durable and designed to withstand multiple washes and wear and tear.
Once it’s on, it’s there to stay. No accidental peel-offs here – your design is in it for the long haul. And you won’t be able to remove it.
5. Layering Potential:
Removable Vinyl: Works for simple designs but can get tricky with intricate layering due to potential peeling.
HTV Vinyl: Great for layering. Create multicolored designs with ease.
How to cut and apply removable vinyl to shirts
Cutting and applying removable vinyl to a shirt as a temporary decal is a fun and creative project.
Here’s a step-by-step guide to help you get started:
Materials You’ll Need:
- Removable vinyl in your desired color and finish.
- Cutting machine (e.g., Cricut, Silhouette).
- Weeding tools.
- A plain shirt, preferably clean and free from lint.
- Transfer tape or transfer paper.
- A squeegee or a credit card for smooth application.
- A workspace with good lighting.
Step 1: Design Your Decal
Use design software compatible with your cutting machine to create or import the design you want on your shirt.
Ensure the design is the right size and shape for your shirt.
Step 2: Load Vinyl into Your Cutting Machine
If you’re using a cutting machine like Cricut, load your removable vinyl onto the cutting mat, aligning it with the mat’s guidelines.
Follow your machine’s instructions to set the material type and blade settings.
Step 3: Cut Your Design
Send the design to your cutting machine.
It will precisely cut out your design based on your settings.
Once the machine has finished, unload the cutting mat.
Step 4: Weed Your Vinyl
Weeding is the process of removing the excess vinyl from around your design using weeding tools or by hand.
Be careful, especially with intricate designs, to only remove the parts you don’t want to be on the shirt.
Step 5: Apply Transfer Tape
Cut a piece of transfer tape slightly larger than your design.
Gently apply it over the weeded vinyl, ensuring it sticks to the decal.
Step 6: Transfer Your Design to the Shirt
Position the transfer tape and vinyl design on the shirt where you want it.
Use a squeegee or a credit card to smooth it out, starting from the center and working your way to the edges.
This ensures a bubble-free application.
Step 7: Remove the Transfer Tape
Carefully peel off the transfer tape, leaving the vinyl design adhered to the shirt.
Take your time and do this slowly to avoid lifting the vinyl with the tape.
Step 8: Final Touches
Once the vinyl sticks to the shirt, go over it again with the squeegee or credit card to make sure it’s well-adhered.
You can also apply some pressure to the decal with your fingers for good adhesion.
Step 9: Enjoy Your Temporary Decal
Your removable vinyl design is now applied to your shirt!
It’s ready for you to wear and show off your creativity.
Remember, this vinyl is best for short-term use and won’t withstand washing or long, or frequent wear.
So be gentle with your newly decorated shirt.
With these steps, you can create and apply temporary vinyl decals to your shirts for special events, holidays, or any occasion that calls for a bit of personalized style.
How do I remove removable vinyl from a shirt without damaging the fabric?
Just gently peel it off.
In most cases, it will go off easily and won’t leave any residue.
Is removable vinyl safe for kids’ clothing?
Removable vinyl is generally safe for kids’ clothing.
But always make sure that the vinyl is securely adhered to prevent any choking hazards.
Always supervise children when using shirts with these stickers.
Can I layer multiple colors of removable vinyl on a shirt?
Yes, you can layer a couple of colors on fabric to create interesting designs.
However, keep in mind that a few layers may peel easier than one.
Can I use an iron or heat press to apply removable vinyl for better adhesion?
Don’t use an iron or heat press with removable vinyl.
Heat doesn’t activate its adhesive the way it does with HTV.
It will only melt it on fabric and completely ruin your shirt.
Only use an iron or heat press with HTV.
Final thoughts
So to wrap up, the answer is yes, you can use removable vinyl for shirts.
It’s a great option if you want to add a temporary creative touch to your clothing.
However, it’s important to keep in mind that this type of vinyl will not survive the wash.
So, if you’re looking for a more long-lasting solution, it may be best to use iron-on HTV vinyl instead.
But don’t let that stop you from getting creative and having fun with removable vinyl on your shirts!
Just be sure to follow care instructions to keep your designs looking their best.


