Ever wondered if infusible ink can really amp up your glass projects? Here’s the lowdown: not all glass is suitable for this material.
Only heat-resistant, poly-coated blanks are the ones that play nice with infusible ink. So, if you’ve got your hands on some glass sublimation blanks, and you’re eyeing that mug or plaque for a makeover, here’s the solution.
In this guide, I’ll break down the nitty-gritty of using infusible ink on glass to make it pop with color. Let’s dive in.
Can you use infusible ink on glass?
Absolutely, you can unleash the vibrant world of infusible ink on glass surfaces!
In fact, the glass design will be permanent.
Say goodbye to peeling.
Once applied, your art becomes a part of the glass itself, promising a lasting impression that defies wear and tear.
And with proper care it can last for years to come.
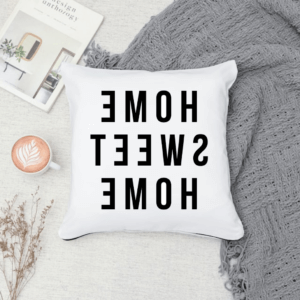
Plus, unlike, for example, permanent vinyl, infusible ink is even dishwasher-safe.
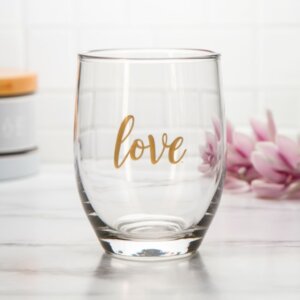
Your adorned items, be it mugs, wine tumblers, or beer glasses, can withstand the test of many wash cycles.
No need to tiptoe around cleaning – infusible ink is here for the long haul.
However, there are a few things you need to keep in mind because not all glass is suitable for infusible ink.
Here’s the lowdown on how to turn ordinary glass into a canvas for your creativity:
1. Choose the Right Glass:

Select special heat-resistant glass sublimation blanks sporting a poly coating.
This magical coating is the secret sauce.
It allows the infusible ink to not just stick, but infuse and bond seamlessly with the surface.
2. Use a Mug Press on Glass Cups, Bottles, or Mugs:
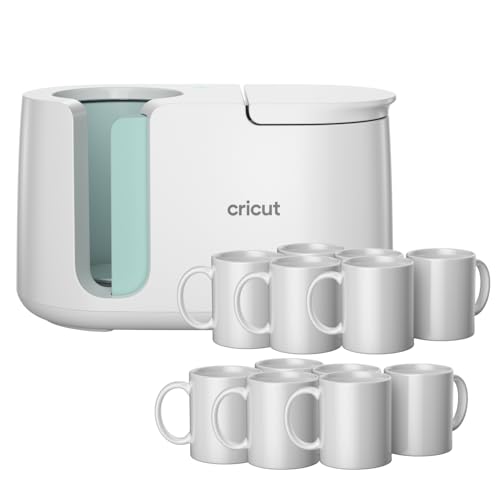
If you want to use your infusible ink designs on curved surfaces like glass cups, jars, or glasses, invest in the Cricut mug press.
This nifty gadget ensures that the infusible ink wraps itself around the item flawlessly, giving your glassware a professional and polished look.
3. Flat Glass? Use the Flat Heat Press:

For beautifying flat glass plaques or coasters, employ a flat heat press.
This versatile tool helps with even application of infusible ink, making your designs pop on those smooth glass surfaces.
Plus, you can use it for applying infusible ink or heat transfer vinyl to shirts, coasters, bags, etc.
4. Gentle Care for Lasting Brilliance:
Whether it’s handwashing or using a dishwasher, infusible ink designs stay put.
But you still need to be a bit careful when cleaning it.
Just remember to wash it only on the top rack of your dishwasher.
Plus, keep the steel wool, colored cleansing agents, and scrubbing pads at bay.
They can damage your designs.
Infusible ink overview
Infusible Ink is a revolutionary crafting material that takes your DIY projects to the next level.
Unlike traditional materials that sit on the surface, infusible ink becomes one with the material it’s applied to.
It creates a seamless and permanent bond.
The ink typically comes in the form of sheets or pens containing specialized ink infused with vibrant pigments.
When activated by heat and pressure, the ink transforms into a gas.
This allows it to penetrate the substrate — whether it’s fabric, ceramic, or, as we discussed earlier, glass.
As it cools, the ink solidifies, becoming a vibrant, durable part of the material itself.
This process ensures that your designs won’t peel, crack, or fade over time.
So you can create long-lasting, professional-quality custom items.
Why use infusible ink on glass
1. Seamless Integration:
Again, infusible Ink doesn’t just sit on the surface like a decal.
It becomes one with the poly coating of the glass sublimation blank.
Your designs will look and feel like an organic part of the glass.
This creates a professional and polished finish.
2. Permanent Brilliance:
Once applied and infused, the design becomes a permanent fixture on the glass.
No peeling, cracking, or fading.
Infusible ink is committed to maintaining its brilliance over time.
3. Vibrant and True Colors:
The pigments in infusible ink are vibrant and true to color.
They create designs that pop with intensity and precision.
4. Dishwasher-Safe Durability:
Unlike some decorating methods that might wither under the pressure of a dishwasher, infusible ink stands tall.
Your glass creations can endure frequent washes, maintaining their beauty and charm, whether it’s a coffee mug or a decorative glass plaque.
5. Versatility Across Glass Shapes:
Whether you’re working on flat glass plaques or curved glassware like cups and jars, infusible ink is versatile.
With the right tools, such as a mug press or flat heat press, you can confidently apply your designs to various glass shapes.
6. Resistance to Wear and Tear:
Infusible Ink on glass is more than just a pretty face – it’s a durable companion.
The designs always withstand daily handling.
So infusible ink on glass is an investment in creating lasting, professional-quality pieces that can endure the tests of time and use.
This is great for creating gifts or items for sale.
How to apply infusible ink to glass
Tools and supplies you’ll need
1. Infusible Ink Sheets or Pens:
First, arm yourself with infusible ink sheets or pens in the colors that fuel your creativity.
These materials carry vibrant pigments ready to infuse your designs onto the glass.
1a. Laser Copy Paper for Infusible Ink Pens:
If you’re using infusible ink pens, get a sheet of laser copy paper.
You’ll need to draw with your pens and markers on it and then transfer that drawing onto your glass blank.
2. Heat-Resistant Glass Sublimation Blanks:
Your canvas matters!
Choose heat-resistant glass sublimation blanks with a special poly coating.
They’ll provide the perfect surface for the magic to unfold.
3. Mug Press for Curved Surfaces:
When dealing with glass cups, jars, or any curvy companions, enlist the help of a mug press.
This gadget will help your infusible ink sheets hug those curves flawlessly, transforming your glassware into works of art.
4. Flat Heat Press for Plaques:
For flat glass plaques or coasters that crave a touch of your artistic flair, bring in the flat heat press.
For example, Cricut EasyPress.
This versatile tool ensures an even application of infusible ink, making your designs stand out on those sleek, smooth surfaces.
5. Cricut machine
A Cricut machine is your crafting sidekick here.
It’s essential for precisely cutting infusible ink sheets or drawing designs with infusible ink pens.
6. Butcher Paper:
Add uncoated white butcher paper to the tool kit.
It plays a crucial role during the heat transfer process.
Placing it over the design helps absorb unwanted ink, distribute heat more evenly, and protect the heat press plate.
It ensures a clean and vibrant transfer onto your glass canvas.
You won’t need butcher paper for the mug press though.
Only use it with flat glass items and your heat press.
7. Heat-Resistant Tape:
This tape secures your infusible ink sheet or design in place, so that it doesn’t shift during the heat and pressure application.
8. Heat-Resistant Gloves:
Guard your hands with heat-resistant gloves.
Safety first!
These gloves can help you handle your glass masterpieces and heat press with care during the application process.
How to apply infusible ink to glass step-by-step
Step 1: Dive into Design Detail:
Select or create a design with the level of intricacy that sparks your creative flame.
Whether it’s a detailed illustration or a heartfelt message, envision your masterpiece.
Step 2: Precision Crafting with Cricut:
If using infusible ink sheets, fire up your Cricut machine to precisely cut those sheets to fit your glass canvas.
For those embracing the pens, let the Cricut work its magic to draw your design with finesse.
Step 3: Securing the Vision:
Use heat-resistant tape strategically to secure your infusible ink sheets or laser copy paper (for pen-drawn designs) onto the glass.
This step ensures a stable position throughout the creative process.
Step 4: Set the Temperature Stage:
Preheat your chosen press to the exact temperature recommended for infusible ink.
You can refer to the Cricut heat guide.
Step 5: Pressing Precision:
Gently place your glass canvas into the mug press or heat press and align it.
Cover with a sheet of butcher paper if using a flat heat press.
Follow the recommended time and temperature guidelines when pressing.
Step 6: Post-Press Patience:
Allow your glass creation to cool for the specified time after the press.
This will let the design settle onto the glass.
Step 7: Peel, Reveal, and Enjoy:
Remove butcher paper, carefully peel away the tape and the backing sheet/laser copy paper sheet, unveiling your infused creation.
Step 8: Let it Settle In:
Patience is key.
Refrain from washing your glass creation for the first 24 hours.
Let the ink settle and bond with the glass, creating a lasting design that stands the test of time.
Can I use any type of glass for infusible ink projects?
No, only use heat-resistant glass sublimation blanks with a poly coating.
This specialized glass provides the perfect canvas for infusible ink, offering a seamless and lasting bond.
Can I layer different colors of infusible ink on the same glass project?
Layering infusible ink is not recommended.
The heat will reactivate the previous layers.
This will result in a smudged and muddy finish.
Stick to a single layer for each design.
However, you can draw with several different colors on one laser sheet of copy paper one by one (just follow the prompts in Cricut Design Space).
Then you can transfer that multicolor drawing in one layer onto glass.
Can I apply infusible ink to tinted or colored glass?
Use clear or white glass for best results.
Tinted or colored glass may affect the vibrancy and clarity of your infusible ink design.
Can I apply infusible ink to glass items that have a textured surface?
No, choose smooth glass surfaces for infusible ink projects.
The ink won’t infuse or bond properly to textured glass.
So you’ll get a bad final result.
Can I use Cricut’s Design Space to create my own unique designs for infusible ink on glass?
Absolutely! Cricut’s Design Space is a fantastic tool for unleashing your creativity.
Craft and customize your designs to match your artistic vision for a truly personalized touch.
Can I use infusible ink on glass items that will be exposed to outdoor elements, like garden decor?
Infusible ink is super-durable.
But it’s still best suited for indoor items.
Exposure to outdoor elements may impact the longevity of the design.
If used outdoors, consider applying a protective sealant to enhance durability.
Final thoughts
So, can you use infusible ink on glass? The answer is yes!
Just make sure to use heat-resistant glass sublimation blanks with a poly coating and the appropriate heat press for flat plaques or cups.
With these tips in mind, you can create beautiful and unique designs on glass using infusible ink.
So go ahead and let your creativity flow on this versatile material!