Custom ceramic tiles or coasters are great for making personalized gifts or decorating your space. Infusible ink is a perfect material for customizing stuff. But can you use infusible ink on ceramic tiles? Sounds good, however, there’s a catch. Not all tiles play nice with this ink.
Stick with me, and I’ll spill the beans on how you can transform those mundane tiles into personalized works of art using infusible ink. Let’s get into it.
Can you use infusible ink on ceramic tiles?
Yes, you can use this type of transfer material on ceramic tiles.
But you must use the right tiles or prepare your blank tile in the correct way.
1. Choose the Right Canvas:

If you’re eyeing ceramic tiles for your next infusion of creativity, the answer is definitely yes!
Infusible ink is like the wizard of the craft world, turning ordinary ceramic tiles into magical canvases.
But beware! Not all tiles are born equal.
**You need to get tiles or ceramic coasters with a sublimation-ready surface.
That means they need to have a polyester coating.**
2. The Science Behind the Magic:
Infusible ink isn’t your run-of-the-mill ink. It is heat-activated.
When the heat press comes into play, this material transforms into a gas, which then bonds into your ceramic tile with pressure.
This chemical reaction ensures your masterpiece stays permanent and won’t wash off, crack, or peel.
3. Prepping Ordinary Tiles.
To use infusible ink on ceramic tiles, you’ve got two choices.
First, you can just buy sublimation-ready tiles, like the Cricut ceramic coasters.
They already come polyester-coated and ready to use with infusible ink out of the box.
**Alternatively, you can give your regular tiles a makeover.
Coat them with polycrylic using a foam paintbrush.**

Now, they’ll be ready to absorb the ink.
4. Heat Press Ceramic Tiles

Don’t use an iron for heat pressing infusible ink onto ceramic tiles or coasters.
It won’t cut it.
You’ll need the power of a heat press, ensuring that every inch of your tile gets enough heat and pressure.
A sizzling 400 °F is the sweet spot, and give it around 4 minutes to make it work.
Infusible Ink Overview
Infusible ink bonds with polyester-coated surfaces or poly fabrics, creating designs that are practically tattooed onto materials.
When the heat and pressure are high enough, it turns into a gas, infusing itself permanently into the chosen surface.
Infusible ink is a great style upgrade for ceramic tiles or coasters.
1. Permanent Bond:
Infusible ink’s permanent bond ensures your designs won’t wash off, crack, or peel.
The ink doesn’t sit on the surface; it becomes one with it.
This means vibrant, detailed designs that won’t fade away, no matter how many coffee mugs rest upon your masterpiece.
Awesome for coasters or kitchen tiles.
2. Versatility in DIY:
You can grab sublimation-ready tiles or treat regular ones with a polyester coating.
It gives you the power to turn any ceramic tile into a piece of art.
How to Use Infusible Ink Magic on Ceramic Tiles?
Tools and supplies you’ll need
1. Cricut Machine:
You will need a Cricut machine to kiss-cut your design on infusible ink sheets or draw it precisely with infusible ink pens or markers.
All Cricut models are compatible with it.
2. Infusible Ink Transfer Sheets or Pens:
These supplies are like the artists’ palette, bringing your designs to life.
Choose your colors and patterns from several popular brands.
I prefer Cricut transfer sheets and pens for most of my creations.
If you’re using pens or markers, also get a sheet of laser copy paper for the machine to draw on. Then use this paper in place of a transfer sheet.
3. Ceramic Tiles:

Opt for sublimation-ready tiles/coasters if you want a hassle-free experience.
Alternatively, you can coat regular tiles with polyester using polycrylic and a foam paintbrush.
4. Heat Resistant Tape:
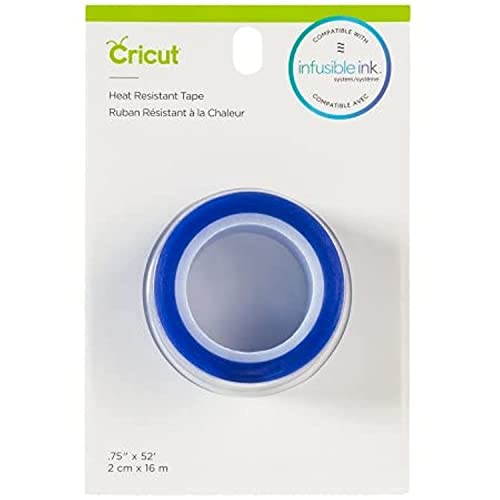
Hold everything together with heat-resistant tape.
This tape ensures your transfer sheets stay put on the tiles during the heat pressing, preventing any unwanted design shifts.
5. Heat Resistant Mat:

Protect your crafting surface with a heat-resistant mat.
It will deflect any unwanted heat and will let you focus on the project in the making.
Plus, it ensures your tiles get an even distribution of heat, crucial for that perfect infusion.
6. Heat Press:
Use a heat press for ceramic tiles.
I love the Cricut EasyPress heat press that is perfect for coasters and is fine-tuned for infusible ink.
An iron won’t cut it. You need an even, controlled and powerful heat source.
7. Butcher Paper:
Cover your design with butcher paper.
This humble addition plays a crucial role – it protects your machine and your project from each other during the heat press process.
How to apply infusible ink onto ceramic tiles step-by-step
1. Design Creation:
Kick off your creative journey by designing your project using Cricut Design Space software.
This is where your imagination runs wild – choose shapes, texts, or intricate patterns for your infusible ink adventure.
Or just select an artwork from a pre-made collection and open it in Design Space.
Don’t forget to mirror your design before cutting the infusible ink.
This ensures that when applied to the tile, your artwork or text reads just the way you intended.
2. Material Selection:
Select the perfect Infusible Ink transfer sheet or pen colors for your project.
Load them into your Cricut machine for a smooth and precise cut or drawing.
3. Cricut Machine Setup:
Prepare your Cricut machine for action.
Precision is key here, so ensure your material is well-secured to the mat to avoid any unwanted surprises. Use a brayer for that.
Also, make sure your mat is loaded correctly, and the machine settings match the infusible ink material.
This will help you make your cuts clean and your design flawless.
4. The Cutting/Drawing Process:
Let the Cricut machine do its magic.
Watch as it meticulously cuts your chosen design from the Infusible Ink transfer sheet or draws it on laser copy paper.
5. Weeding:
Use your fingers to delicately remove the excess transfer material.
You want to get rid of any unwanted parts for your design to shine through.
So take your time and weed infusible ink using the “cracking” method.
6. Tile Preparation:
Now, prepare your ceramic tile.
If it’s not sublimation-ready, coat it beforehand with polyester using polycrylic and a foam paintbrush.
Ensure it’s clean and dry, ready to embrace the infusion of ink.
7. Placement and Securing:
Position your weeded design on the ceramic tile.
Use heat-resistant tape to secure it in place.
This step is crucial to prevent any design drift during the next phase – the heat press.
8. Heat Press Setup:
Bring out the heat press and set it to the recommended temperature for infusible ink, typically around 400 degrees Fahrenheit.
Ensure your tile is well-supported on the press or on work surface and cover it with a piece of butcher paper.
9. Heat Pressing the Ceramic Tile
Place your tile, adorned with the Infusible Ink design, under the heat press plate.
Close the press, and let the heat transform the ink into a gas.
It will infuse permanently into the polyester-coated ceramic surface.
10. Reveal and Admire:
Once the press time is up (usually around 4 minutes), carefully open the heat press.
Remove the butcher paper, tape and peel back the backing of the transfer sheet.
Behold your masterpiece – a vibrant, permanent design on a ceramic tile.
How to coat your ceramic tile with polycrylic for use with infusible ink?
Tools and Supplies:
1. Ceramic Tile:
Choose a white or light pastel-colored ceramic tile as the base.
The color matters – it’s the canvas on which your infusible ink design will shine.
2. Polycrylic:
This is necessary for creating a polyester coating.
Opt for a clear, water-based polycrylic to ensure it doesn’t alter the color of your chosen tile.
Make sure it’s non-yellowing too.
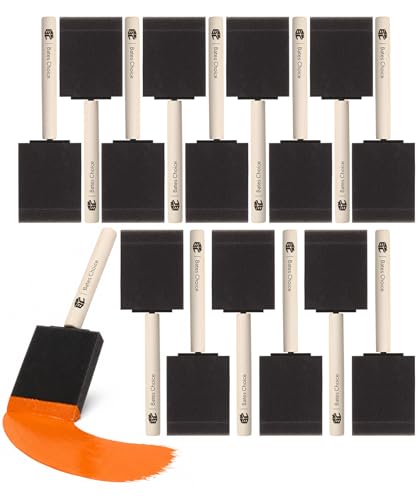
3. Foam Paintbrush:
A foam paintbrush is the best tool for applying the polycrylic evenly onto the ceramic tile surface.
Plus, it doesn’t leave visible strokes like ordinary brushes do.
4. Protective Gloves:
Keep your hands clean and protected with gloves while applying the polycrylic.
5. Butcher Paper
This is necessary for protecting your work surface.
Place the tile on butcher paper to prevent the polycrylic coating from getting onto your table.
6. Good Ventilation
Polycrylic has a strong odor.
Always work in a well-ventilated area.
The Coating Process Step-By-Step:
1. Clean the Tile:
Ensure the ceramic tile is clean, dry, and free of any dust or debris.
Go over it with a dry lint-free wipe.
A clean canvas sets the stage for a flawless coating.
3. Apply First Coat:
Dip the foam paintbrush into the polycrylic and start applying the first coat onto the ceramic tile.
Work in even strokes, covering the entire surface.
This coat should be thin.
Don’t worry if it looks a bit milky. It’ll clear up as it dries.
4. Dry Time:
Allow the first coat to dry completely.
This usually takes a couple of hours, but check the product label for specific drying times.
5. Apply the Second Coat:
Repeat the process for the second coat.
Just make it thick. This coat will absorb the infusible ink.
Usually 2 coats are sufficient.
6. Final Cure:
Let the final coat cure according to the polycrylic’s instructions.
Make sure it’s fully dry before you apply heat to it.
Can I use any ceramic tile for infusible ink projects?
Not all ceramic tiles are created equal.
For use with infusible ink, your tile needs to be sublimation-ready, boasting a polyester coating.
Alternatively, you can transform regular tiles into suitable ones by applying a polyester coating using polycrylic.
Why does the color of the ceramic tile matter?
For the colors to pop and the design to shine, choose a white or light pastel-colored tile.
Dark tiles might make your art invisible. The ink just won’t show up.
Can I use an iron instead of a heat press for ceramic tiles?
While an iron is a handy sidekick for certain projects, when it comes to ceramic tiles and infusible ink, go for the power of a heat press.
It creates high heat, pressure, and even heat distribution. And it’s a crucial factor for the ink to work its permanent magic.
Can I reapply infusible ink to a ceramic tile if I make a mistake?
Once the ink has been applied with the heat press, it becomes a permanent part of the tile’s surface.
There’s no turning back.
Ensure your design is flawless before you get to the pressing step.
Can I use any type of polycrylic for coating the ceramic tile?
Stick to the clear, water-based polycrylic.
It ensures a transparent coating, letting the chosen color of your ceramic tile shine through without alteration.
How do I clean my ceramic tile after applying infusible ink?
Treat it with care.
First, wait for at least 24 hours for the ink to fully set.
Always use a mild, non-abrasive cleaner, and avoid harsh chemicals or scrubbing.
Can I layer infusible ink designs on ceramic tiles?
Layering is great for vinyl, but not for infusible ink on ceramic tiles.
Each layer of ink becomes a part of the tile’s DNA during the heat press process.
Adding more layers will reactivate the ink and muddle the art, affecting the final outcome.
Can I use infusible ink on three-dimensional or textured ceramic tiles?
Stick to flat and smooth surfaces.
Infusible ink requires an even, consistent surface for the heat press to work its magic.
Three-dimensional or textured tiles might not provide the optimal conditions for a successful infusion.
Can I apply infusible ink to previously used ceramic tiles?
No, you’ll need a fresh tile.
Infusible ink requires a clean slate.
If a tile has been previously used, decorated, or has any residue, it might affect the ink’s ability to make a lasting impression.
Can I wash my ceramic tile with an infusible ink design?
Treat it gently.
Handwashing is usually the way to go.
Use a mild detergent and avoid abrasive scrubbing to preserve the vibrancy and longevity of your infusible ink art.
Final thoughts
So, can you use infusible ink on ceramic tiles?
The answer is yes, but it’s important to make sure you have the right type of tiles or prepare them properly beforehand.
By choosing tiles or ceramic coasters with a polyester coating, or coating your own tiles with polycrylic, you can successfully use infusible ink to create beautiful and personalized pieces.
Don’t be afraid to experiment and have fun with this unique and versatile crafting material!