As a crafter, you know that having the right tools can make all the difference in your projects. And when it comes to cutting soft, thin, and flexible materials with Cricut, a brayer is one of the best tools you can have. But what if you don’t have it at hand? Is there a Cricut brayer alternative that can give you the same results?
The short answer is yes, there are several Cricut brayer replacement items that you can use. In this article, we’ll take a look at some of the best options so that you can find the perfect one for your needs.
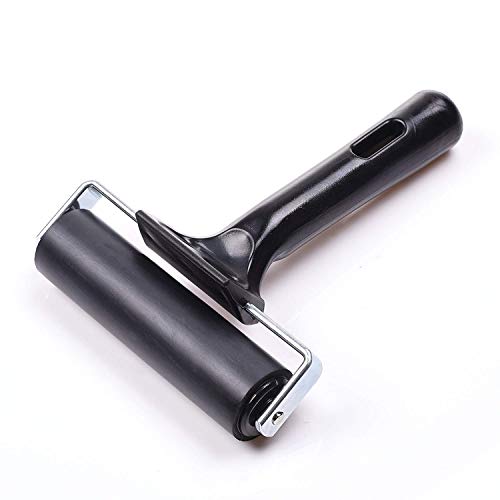
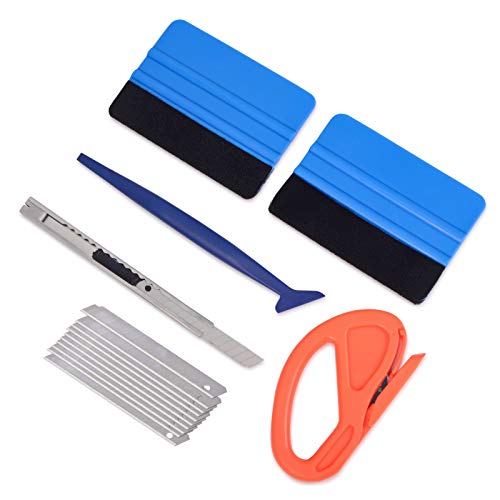
Quick Tip: My top overall choice is a budget-friendly rubber brayer from another brand — I love how my Akiro rubber brayer smooths out vinyl.
Cricut brayer alternatives
If you’ve ever used a Cricut cutting machine, you know that one of the most important parts of the process is getting the material you’re cutting to lie flat and smooth on the mat.
The cutting mat has a sticky surface that helps to grip the material, but if there are any wrinkles or bumps in the substrate, it can cause problems.
One way to smooth out the material is to use a brayer.
A brayer is a handheld roller that is specifically designed for making stuff lie flat and even. However, if you don’t have it at hand alternative options to the Cricut Brayer are available and can be just as effective.
What is Cricut brayer?
If you’re new to crafting with a Cricut machine, you may be wondering what a brayer is and why you need one.
A craft brayer is an essential tool for any crafter, whether you’re a beginner or a professional.
A Cricut Craft Brayer is a convenient roller with a handle that is used to smooth the material on the Cricut cutting mat.
This is important to prevent air bubbles and wrinkles from forming on the material you’re cutting, such as vinyl or fabric.
Using a brayer is an essential step in the cutting process because it ensures that the substrate is cut correctly.
The smooth, flat, even application that a brayer provides is perfect for creating consistent results on a variety of surfaces.
Plus, the Cricut Brayer is budget-friendly, so it’s a great investment for your crafting toolkit.
Why do you need a brayer with Cricut?
The way the material you’re cutting is placed on the mat can affect how well your Cricut cuts.
The material on the cutting mat can bunch up or move around, making it difficult to get a precise cut.
If the material is too bumpy, it can cause the cutting blade to snag or skip and produce less-than-perfect results, wonky cuts, and a lot of wasted vinyl or fabric.
So it is important to roll a brayer over the material on the cutting mat to flatten it down.
Best Cricut brayer alternatives
There are a few Cricut brayer alternatives if you don’t have it within your reach.
A hard, flat object like a squeegee or a ruler can be used to press down and smooth out the material.
A credit card can also be used to easily get rid of any air bubbles or wrinkles in the material.
Other Cricut brayer alternative options are:
- A hard, flat surface like a cutting board
- A bone folder
- A rolling pin
- A fondant roller
- A plastic or metal straight edge
- An empty can of soup or other food
- A credit card or gift card
If you don’t have any of these objects on hand, you can also use your hands to press stuff like fabric down.
Here are some of the options in more detail:
1. Brayer roller from another brand
If you’re looking for an even more budget-friendly alternative to the Cricut brayer, consider a handheld roller from another brand.
There are several options available that provide a similar level of smoothness for your materials and can work just as well.
Just be sure to select one that has a size compatible with your Cricut mat and that will work well with the products you’re using.
For example, you may want to check out this one:
Rolling pin
If you don’t have a brayer at hand, you can use a rolling pin to smooth the material on the Cricut cutting mat.
A rolling pin is a kitchen utensil used to roll out dough.
Its best feature is that it can evenly distribute the pressure over a large area.
Just roll the pin over the mat, applying pressure as needed, until all the wrinkles and bumps are gone.
This will let you get a cleaner cut and will also help to prevent the design from shifting.
Rolling pins come in a variety of sizes, materials, and shapes.
The most common rolling pin is simply a cylinder made of wood, plastic, or marble.
Some rolling pins have handles, while others don’t.
Here are some tips on how to use this device for crafting with Cricut:
- First, make sure the mat is clean and free of debris.
- Place the material on the mat, then use the rolling pin to roll over the material, applying pressure as needed.
- Apply light pressure to the rolling pin to smooth out the substrate.
- Use even pressure to avoid creating creases or folds.
- Start in the center and work your way out to the edges.
- Roll the pin back and forth until everything is smooth.
- Lift the rolling pin and check the results.
- Once the material is flat and even, use the Cricut cutting machine to cut it as desired.
2. Fondant roller
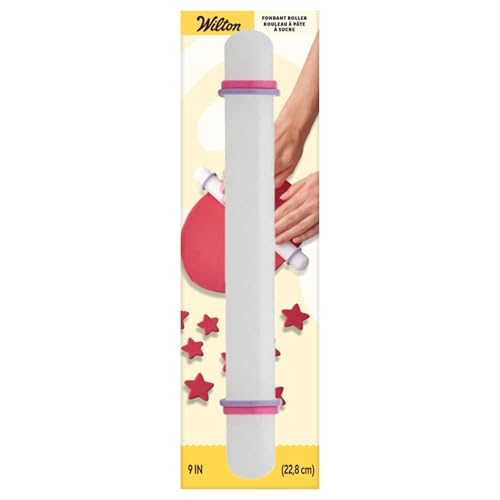
A fondant roller is a necessary tool for anyone who wants to make perfect fondant decorations for cakes, cupcakes, and other desserts.
Fondant is a type of icing that is used to decorate cakes and other desserts.
It’s made from sugar, water, and gelatin, and can be flavored with extracts or fruit juices.
Fondant is rolled out into a thin sheet and then cut into shapes or used to cover a cake. It can be dyed any color, and dries hard, so it can be used to create intricate designs.
A fondant roller is a long, thin rolling pin that is used to roll out fondant to an even thickness.
This tool is covered in a smooth, non-stick surface that is perfect for rolling out fondant or any other tacky stuff.
Fondant rollers come in different sizes, so you can choose the right one for the job.
This tool is a great Cricut brayer alternative for smoothing out materials on your cutting mat.
To use a Fondant roller, simply roll it over the mat in the same way as you would do using a rolling pin.
You can use multiple passes to get a smooth finish.
Be sure to roll in different directions to avoid creating any lines or wrinkles.
3. Squeegee
A squeegee is a tool that is used to remove water, adhesive residue, and other foreign matter from surfaces.
Its blade is typically made of rubber or silicone and some squeegees have a handle that is used to manipulate the blade.
Squeegee is also used to apply or remove pressure-sensitive materials, such as decals and stickers, and to spread the material evenly and smoothly.
When you use a squeegee over your material cutting mat, it will help to smooth out its bumps or ridges.
This will result in a more even surface for your Cricut blade to cut through.
Utilising a squeegee as a Cricut brayer alternative is a quick and easy way to smooth out thin stuff, like vinyl or window cling.
All you need to do is run the squeegee over the surface of the mat, applying even pressure, in short, even strokes.
Be sure to cover the entire surface area of your design.
Here are some more tips on how to use a squeegee:
- Before using your squeegee, make sure that your cutting mat is clean and free of debris.
- Place your material on the cutting mat, and then gently run the squeegee over the surface of the material.
- Apply pressure as needed to smooth out the material.
- If you have any stubborn creases or wrinkles, you can use the point of the squeegee to gently press them out.
- Once you’re satisfied with the results, proceed with cutting your material.
I recommend using a special squeegee sold for smoothing out vinyl and car decals.
4. Credit card or a gift card
One way to make sure your material is smooth and even on the cutting mat is to use a credit card to go over the surface before you start cutting.
This little tool works especially well for small pieces of material.
Just gently run the credit card over the surface of the material a few times in different directions, being careful not to go over the same area too many times.
This will help to release any air bubbles and will make sure the material lies completely flat.
There are a few things to keep in mind, however.
- First, make sure that the cutting mat is clean and free of debris.
- Second, use light pressure when running the credit card or gift card over the material.
- Third, move the credit card or gift card in a single, fluid motion.
- Finally, avoid pressing too hard, as this could damage the mat.
Once you’ve done this, you’re ready to start cutting!
5. Bone folder
A bone folder is a small, handheld tool that is used to score, fold, and burnish paper. It is usually made from bone or ivory, but can also be made from plastic, wood, or horn, and has a dull, rounded edge.
Bone folders are used to create clean, crisp folds in paper. They can also be used to create creases for origami or to burnish the edges of paper for a smooth finish.
This nifty little tool is a good Cricut brayer alternative that can help you to press the material you’re cutting onto the cutting mat, and then smooth it out for a clean cut.
Here are some tips on how to use a bone folder to get the best results:
- First, make sure your bone folder is clean. A dirty bone folder can leave marks on your material.
- To use a bone folder, simply gently run it over the surface.
- Keep the bone folder perpendicular to the mat while you’re using it.
- Use light pressure. You don’t want to damage the material or the mat.
- Use long, even strokes. This will help ensure a smooth, even surface.
- If you find that the bone folder is snagging on the material, stop using it and switch to a different tool.
- Repeat the process until you’re happy with the results.
- Inspect your work after you’ve used the bone folder to make sure there are no scratches or other damage.
6. A hard, flat surface like a cutting board
If your material isn’t lying flat on the cutting mat, you can use a hard, flat surface like a cutting board to smooth it out.
Simply place the cutting board on top of the mat and use your hand to press down on the board, moving it back and forth until the material is lying flat.
Or gently run one edge of the board along the entire surface of the mat from one edge to the opposite edge.
You may need to do this a few times to get the desired results.
Some tips for using a cutting board:
- Make sure the cutting board is larger than the mat. This will make it easier to smooth the material evenly on all sides.
- Use a cutting board with a smooth surface and edges. This will help prevent the material from catching or snagging on the board.
- Use a light touch when smoothing out the material. You don’t want to press too hard and risk damaging the mat.
7. An empty can of soup or other food
If you’re looking for a quick and easy way to smooth out the material on your cutting mat, look no further than your kitchen pantry!
All you need is an empty can of soup or other food, or any other can with a smooth, rounded edge.
Make sure the can is clean and dry.
Place the can on the mat, and roll it back and forth like a rolling pin until the material is flat.
8. Empty pet hair roller/lint roller
A lint roller is a small, hand-held tool that is covered in sticky paper or fabric and is used to remove lint, hair, or other debris from clothing and upholstery.
It consists of a plastic roller with adhesive tape wrapped around it.
The roller is rolled over the surface of the fabric to pick up the debris.
A lint roller is a great tool to use to smooth out the material on your Cricut cutting mat, provided that you remove the adhesive tape and only use the empty plastic roller with a handle.
Here are some tips on how to use a lint roller as one of Cricut brayer alternatives:
- Make sure that your lint roller is clean and free of any dust or debris, and that the adhesive tape is removed.
- Gently roll this tool over the material on your cutting mat.
- Start by rolling it over the mat in one direction. Then, move it in the opposite direction.
- Apply light even pressure.
- However, be sure to roll it gently to avoid damaging the material or the mat.
- Lift the lint roller and check your work. If there are any remaining wrinkles or air bubbles, repeat the process.
9. Wine bottle
If you’re looking to smooth out the material on your cricut cutting mat, one method you can try is rolling a clean empty wine bottle over it to get rid of any wrinkles or bubbles.
Start by placing the bottle on one end of the mat and then slowly rolling it across the surface until you reach the other end.
You may need to repeat this process a few times until the material is evenly flattened.
Here are a few things to keep in mind when rolling a wine bottle over your cutting mat:
- Make sure the mat and the bottle are clean before starting. The bottle should be empty and dry of any liquid.
- Apply even pressure as you roll the bottle across the surface.
- Roll the bottle in one direction only – don’t backtrack or go over the same area too many times, since the bottle is pretty heavy.
- If the material on the mat still bunches up, try using another smoothing tool.
10. Ruler
To ensure precise cuts with your Cricut cutting machine, you can use a ruler as a brayer alternative, especially if you’re cutting fabric.
Use its straight edge to push down on the fabric and help flatten it out.
Hold the ruler securely in place so that it does not slip.
Use a gentle back-and-forth motion when smoothing the material.
Be sure to work slowly and evenly so that the material does not bunch up or warp.
Be careful not to apply too much pressure, as this can damage the cutting mat.
If the material is not smooth after the first pass, try gently going over the area again.
If you are cutting multiple sheets of fabric, be sure to line them up evenly before flattening them with the ruler.
With a little practice, you will be able to achieve perfect cuts every time!
11. A piece of cardboard
One way to help ensure a smooth cut is to run a piece of cardboard over the material on your cutting mat before you start cutting.
This will help to smooth out any wrinkles or unevenness on its surface, making it easier for the Cricut blade to cut.
Just place the piece of cardboard on top of your material on the cutting mat and run it back and forth a few times.
You’ll see the bumps and imperfections starting to disappear.
Be sure to use even pressure so that the material does not bunch up.
Once the surface is smooth, you can then proceed with cutting it with the cricut.
This method is especially helpful if you’re cutting out multiple layers of fabric.
Cardboard is a good item to use because it is stiff and will not bend under the pressure of your hands. Plus, it is easy to find and usually free!
So next time you’re having trouble getting a smooth cut with your Cricut machine, try using a piece of cardboard to help you out. You’ll be surprised at how well it works!
12. Your hand
If there are no tools or appropriate objects within your reach you can just use your hand to smooth out the material, applying even pressure as you go.
Place your hand on the material and just gently glide it over the surface to even it out.
Use your fingers to lightly smooth the material down, working from the center outward.
To avoid damaging your cutting mat, it is important to use a light touch. Be careful not to press too hard or you may distort the mat or cause your material to warp.
For best results, always smooth in the same direction.
Here’s how to do it:
- First, make sure the cutting mat is clean and free of debris.
- Place your material on the cutting mat, making sure it is lined up where you want it to be cut.
- Use your hand to smooth the material down, starting from the center and working your way out to the edges.
- Once the material is smooth, you’re ready to start cutting!
If you’re a Cricut lover, you know that a brayer is an essential tool for getting the perfect cut on your projects.
But what do you do when you can’t find a Cricut brayer or when you’re looking for a simple and easy-to-use alternative?
Select one of the Cricut brayer alternatives from this list that will get the job done.
Experiment with a few different options to see what works best for you.