If you’ve ever wondered — will Cricut vinyl will stick to felt? — wonder no more! This article will give you all the details you need to know about using Cricut vinyl on felt.
You’ll learn about the different types of vinyl, the best way to apply this material to felt, and how to ensure a long-lasting hold.
Let’s jump right in:
Can Cricut vinyl stick to felt?
If you’re looking for a versatile and durable material for your craft projects, look no further than felt!
Felt is a great material to use for tons of purposes, and it’s also budget-friendly. You can find it at most craft stores and on Amazon.

If you’re like me, you love finding new and unique ways to use your Cricut cutting machine.
When I recently came across the question of whether Cricut vinyl would stick to felt, I was intrigued.
I did some research and testing and found that yes, Cricut vinyl will stick to felt if you use the correct type of vinyl — heat transfer vinyl (HTV) aka iron on.

So if you’re looking for a fun and unique way to decorate felt projects, grab some iron on vinyl and your Cricut machine and get to work!
What is heat transfer vinyl?
Heat transfer vinyl is a type of adhesive vinyl that is used to create graphics on fabrics, including t-shirts, aprons, tote bags, and felt items.
It can be cut with a Cricut machine and needs to be applied to fabric with a heat press or iron.
For example, you can decorate your favorite shirts with intricate designs, personalize your clothing, and make felt banners and pillowcases.
Heat transfer vinyl is available in many different colors, patterns, and finishes, which means there’s something for everyone.
It’s also budget-friendly and easy to use, making it a great option for beginners.
So, whether you’re looking to start your own t-shirt business or just want to make a few custom fabric or felt items for yourself, HTV is a great place to start.
What heat transfer vinyl will stick to felt best?
There are two brands of heat transfer vinyl that, in my opinion, work best on fuzzy fabrics like felt and have the highest quality and staying power.
They are Cricut Everyday Iron On and Siser EasyWeed.
I have used both products, and I think they are the best on the market because of their ease of use and application, as well as their durability.
If you are looking for a high-quality heat transfer vinyl that will stick to your fabric and last through multiple washes then consider using these two brands.
They come in a variety of colors, patterns, and special finishes so you can find the perfect vinyl to match your felt fabric or any project idea.
Will permanent adhesive vinyl stick to felt?
Cricut vinyl comes in a variety of types, including permanent adhesive vinyl, which is another popular type of vinyl for crafters.
But can permanent adhesive vinyl be used on felt?
Unfortunately, the answer is no.
Permanent adhesive vinyl is a great product but it can only adhere to smooth surfaces, like glass, plastic, or metal, and shouldn’t be used on fabrics.
If you try to use it on felt, this material won’t stick and will likely peel off.
So if you’re looking to add some vinyl embellishments to a felt project, you’ll have to use the heat transfer type of vinyl only.
How to stick cricut HTV vinyl to felt?
Again, if you’re looking for a fun and easy way to add some personalization to your felt projects, heat transfer vinyl is a great option!
In this post, I’ll show you how to apply HTV to felt step by step.
You’ll need a few supplies to get started, but once you have everything set up, the process is pretty quick and easy:
What you will need
- A Cricut machine.
- Fine Point Blade.
- Heat transfer vinyl.
- Cricut StandardGrip cutting mat.

- A weeding tool.
- Cricut EasyPress heat press mat or a smooth folded towel.

- An iron or a heat press.
- A piece of felt cut to the size needed for your project.
If you’ve been looking for an easy way to apply heat transfer vinyl to felt, then you may want to check out Cricut EasyPress.
This heat press is specially designed for Cricut vinyl transfers, so you can quickly get professional-looking results with it.
Plus, it’s very easy to use and provides even heat distribution with no hot spots.
First, cut your vinyl design
- To start, you’ll need to gather your supplies.
- To cut iron on vinyl with a Cricut machine, you will need to place the vinyl onto the StandardGrip cutting mat with the shiny (carrier sheet) side facing down and insert the Fine Point blade into the machine.
- Then, select the appropriate setting on the machine, which in this case will be “Iron On”.
- Next, you’ll need to open or create the design you want to cut out and size it to fit your felt project.
- Mirror the design. This is very important!
- Then hit “Go”.
- The Cricut machine will then cut out the graphic.
- Weed the unwanted vinyl and transfer the finished design to your felt surface.
- Use an iron or a heat press to stick the vinyl to felt.
How to stick Cricut heat transfer vinyl to felt with an iron or a heat press
There are three main ways to apply heat transfer vinyl (HTV) to felt: using an iron, using a heat press, or using the Cricut EasyPress heat press.
If you’re using an iron or a heat press you’ll need to be careful not to overheat the vinyl, which can cause it to warp.
Plus, with iron, it can be difficult to get an evenly-pressed graphic.
The Cricut EasyPress is the easiest way to get professional-looking results.
Once you’ve chosen your method, it’s time to get started!
- Make sure your felt material is clean and lint-free before applying your vinyl graphic to it.
- Place the chosen piece of felt on the EasyPress mat or a folded towel and preheat the felt for about 5 seconds.
- Cut your design out of iron on vinyl, then position it on the felt, with the carrier sheet (the shiny side) facing up.
- If you’re using an iron or a heat press, place a piece of cloth, parchment paper, or a Teflon sheet between the heat plate and the design.
- Apply heat for 30 seconds (or 10-15 seconds with the EasyPress).
- Flip over your felt piece and press the back of it for 10-15 seconds.
- Let the carrier sheet cool and pull it away slowly.
How to make sure heat transfer vinyl stays on felt better and lasts longer
If you’ve never used HTV before, you might be wondering how to make sure it adheres to felt better and lasts longer.
Here are a few tips:
- First, make sure your felt is clean and free of any dust, debris, or dirt. This will help the vinyl adhere better.
- Next, use a lint roller to remove any lint or fuzz from the surface of the felt.
- Always pre-press your felt material. This step helps to ensure that HTV vinyl adheres to the felt piece better and that there are no creases or moisture left. Simply place a heat press over it for about 5 seconds to smooth it out.
- Select the correct temperature setting for your material on your iron or heat press. Refer to Cricut’s Heat Guide for getting it right for your vinyl and felt fabric.
- If you’re using an iron, place a thin piece of fabric over the vinyl design before ironing. This will help to distribute the heat more evenly and will prevent the HTV from sticking to your iron’s plate.
- Don’t use the steam function on the iron, the moisture won’t let the vinyl stick to the felt.
- When using a heat press, place a Teflon sheet over your vinyl design. This will help to protect your design and prevent the vinyl from sticking to the heat plate.
- Apply even pressure. Once you have your vinyl in place, use even pressure when pressing it with the iron or heat press. This will help to ensure a good adherence on all sides.
- Preferably, use the EasyPress heat press instead of iron for an even application. It’s so easy to use and you won’t need a Teflon sheet or a press cloth with it. Just place your vinyl design on the felt, then press the EasyPress down for 10-15 seconds. That’s it!
- Finally, be sure to allow the iron decal plenty of time to cool and set before using or handling your item.
Cricut heat transfer vinyl on felt project ideas
There are many different projects that you can create by cutting heat transfer vinyl with a Cricut machine and applying it to felt:
- Create a felt keychain by cutting out a small shape from the vinyl and then applying it to a piece of felt.
- Make a felt coaster set by cutting out letters or images from the vinyl and then applying it to felt circles.
- Make a set of felt placemats with quotes or other designs made of vinyl.
- Decorate a felt tote bag or a purse, or a set of lunch bags.
- Create a felt banner, a sign, or a wall hanging with a quote or a logo made from HTV.
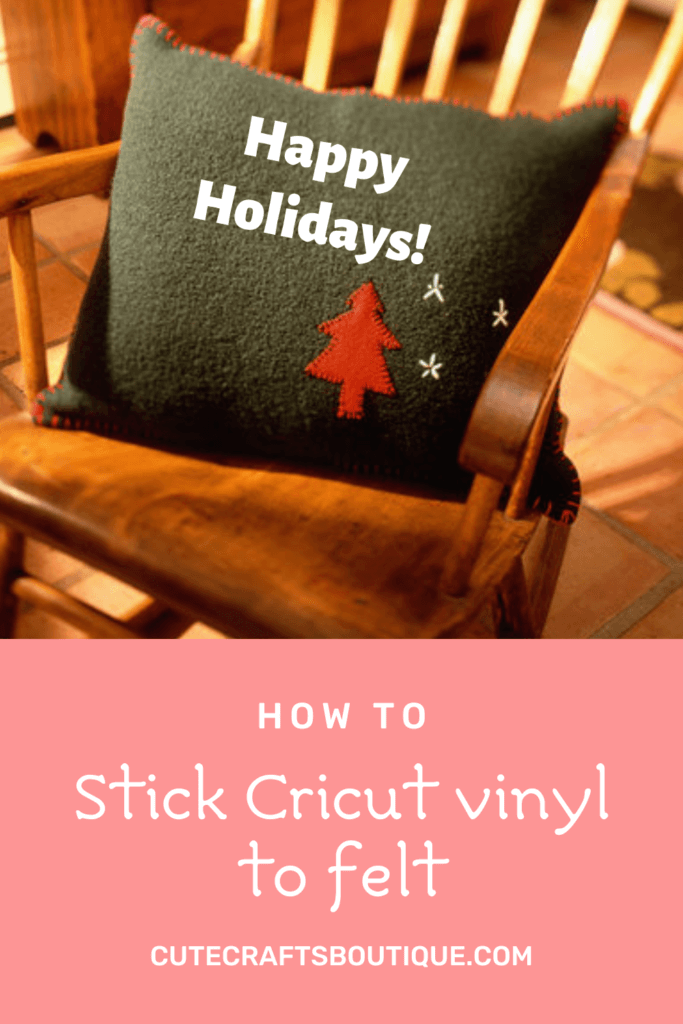
- Adorn a felt pillowcase with a festive design or with a monogram cut from vinyl with Cricut (this would make an excellent gift).
- You could also work on smaller projects such as ornaments or magnets.
To summarize, yes, Cricut vinyl can adhere to felt if you’re using heat transfer vinyl.
This is a great option for those who want to add some personalization to their felt projects.
Have fun with it and experiment to see what looks best!