Are you just starting out with Cricut and are still uncertain if you should mirror your design before cutting infusible ink sheets?
This blog post will discuss whether it is necessary to mirror your design while cutting with Cricut on infusible ink sheets and provide you with some useful tips to ensure that you achieve the best possible results.

Infusible ink overview
Infusible ink is a relatively new heat transfer material.
It lets you create vibrant and permanent designs on a variety of materials, including t-shirts, coasters, tote bags, and more.
Infusible ink is different from conventional iron-on or vinyl transfers because it integrates the design into the textile fibers, rather than remaining on top of the material.
This creates a durable and high-quality finish that won’t crack, peel, or fade over time.
You can use infusible ink sheets with all types of Cricut machines.
These sheets are available in a wide range of colors and patterns.
To use infusible ink, you’ll first need to design your artwork using Cricut Design Space software.
Then you can cut the design from the infusible ink sheet with your cutting machine.
Each sheet has two sides.
One side is the liner and the other side contains the ink.
You have to kiss cut the ink side with your Cricut without cutting the liner side.
Once you’ve weeded the excess material away, you can transfer the design onto your blank material using a heat press or a mug press.
The design that is kiss-cut on your infusible ink sheet is placed on the blank with the ink side down and the liner side up.
That’s why it’s important to correctly prepare and position the design for cutting with Cricut.
The heat from the press or iron causes the ink to sublimate, or turn into a gas, which then bonds with the fibers of the material.
This results in a permanent, high-quality finish that looks and feels like it’s part of the material itself.
Infusible ink is an excellent choice for creating custom apparel, gifts, and home decor items that will stand the test of time.
And the process of crafting with it is surprisingly easy once you get the hang of it.
Do you need to mirror infusible ink designs?
Yes, you need to mirror your design before cutting it from the infusible ink sheet with your Cricut machine.
Just like you do with Cricut Iron On or other brands of HTV vinyl.
This is because the design will appear in reverse when transferred onto your blank material if it’s not mirrored.
Why do you need to mirror your infusible ink design before cutting it?
As I’ve already mentioned above, one thing that’s crucial when working with infusible ink is preparing your design for cutting correctly.
This means not only using the correct settings on your Cricut cutting machine but also mirroring your design before cutting.
To do it, you’ll need to flip the artwork horizontally so that all text and design elements are reversed.
That way your art will look correct on the blank material.
It may seem like a small detail, but forgetting to do it can result in a finished product that looks completely different from what you intended.
To transfer the design onto your blank material flawlessly, you’ll need to apply the kiss-cut infusible ink sheet face down with the ink side in contact with the fabric using a heat press.
If you don’t mirror your design before cutting, all the text and design elements will appear in reverse on your finished product.
For example, if you’re creating a t-shirt with the word “LOVE” on it, and you forget to mirror the design, the final product will read “EVOL” instead.
This is why you always need to mirror your design when working with infusible ink.
After all, the heat transfer process causes the ink to sublimate and bond with the fibers of the material
This creates a permanent finish.
That’s why after you’ve pressed your design, you can’t fix any mistakes anymore.
So if you hadn’t mirrored the design before cutting you’ll ruin your finished project.
How to prepare infusible ink for cutting with Cricut correctly?
To cut infusible ink with Cricut, you’ll need a few essential tools and supplies:
1. Cricut machine
First, you’ll need a Cricut cutting machine.
Such as the Cricut Maker, Cricut Explore, or Cricut joy.
These machines are designed specifically for cutting intricate designs.
And all of them are compatible with infusible ink sheets and Cricut Design Space software.
2. Cricut Design Space
You’ll need to use your cutting machine with Cricut Design Space software.
This app makes it easy to design, mirror, resize, and cut your infusible ink projects.
3. Cutting mat
You’ll also need a cutting mat, which is a flat surface that holds your infusible ink sheet in place while the machine cuts the design.
Cricut offers a range of cutting mats, including the StandardGrip mat, the LightGrip mat, and the StrongGrip mat.
Each mat is designed for a specific type of material and provides the necessary grip level for accurate cutting.
Get the StrongGrip mat for infusible ink.
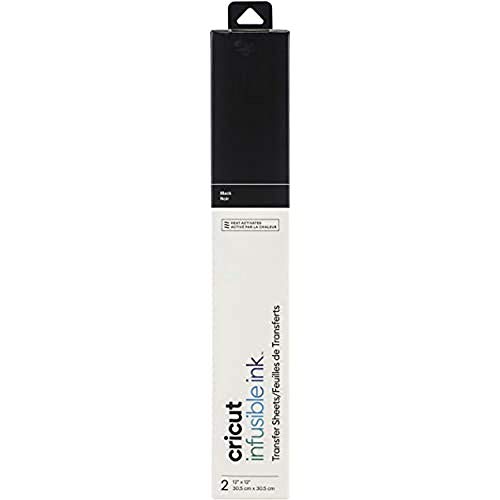
4. Infusible ink sheets
Infusible ink sheets are available from different brands in a variety of colors and finishes to choose from.
This includes solid colors, patterns, and even some special finishes.
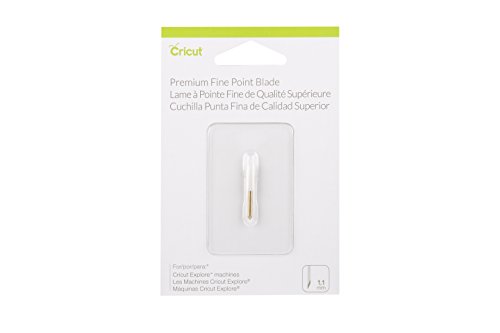
5. Cricut Fine Point Blade
You will need the Cricut Fine Point Blade to cut infusible ink with a Cricut machine.
This blade is specifically designed to make complex cuts with fine details and create clean edges.
6. Heat press or a mug press, blanks, and accessories
You will also need a heat press (the best one is the Cricut Easypress) or mug press to transfer the ink to a blank.
Blanks to serve as the surface for your design.
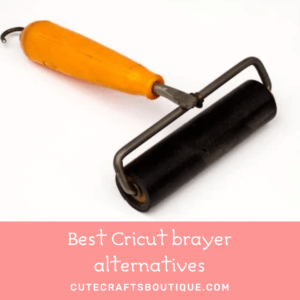
Plus, get butcher paper and card stock to protect the blank and the design from the heat press plate, and a brayer to smooth the ink sheet on the mat.
How to mirror infusible ink designs in Cricut Design Space
So, now you already know that mirroring your design in Cricut Design Space is a super-important step when preparing your design for cutting infusible ink.
Here’s how to do it correctly:
- Open the Cricut Design Space app and select your design.
- Or create the design in this app from scratch.
- After you select the design you want to mirror, click ‘Flip’, and then select ‘Flip Horizontally’. It’s that simple.
- Your design will now be mirrored and appear in reverse. This is how it should look when transferred onto your blank material.
- Once you’ve mirrored your design, you can adjust its size and position it to fit your infusible ink sheet.
- Place your Infusible Ink sheet on your cutting mat with the ink side facing up and the liner side facing down.
- Smooth out any wrinkles, bubbles, or air pockets with a brayer to ensure a clean cut.
- Insert the mat with the ink sheet into the Cricut machine and let the rollers grip it.
- Press the “Load” button. Make sure that the mat is loaded straight and that it’s firmly in place.
- In Design Space, select “Infusible Ink” as the material setting for your project. This will help the machine use the correct cut and pressure settings for infusible ink.
- Press the “Go” button on your machine to begin cutting your design. The machine will kiss-cut through the top layer of the infusible ink sheet, but not through the backing material.
What happens if I don’t mirror my design when cutting infusible ink with Cricut?
If you don’t mirror your design, it will appear in reverse when transferred onto your blank material.
This is because the design is transferred ink side down, so it will be flipped horizontally during the transfer process.
So texts and logos will look especially bad.
Is it necessary to use a Cricut machine for cutting infusible ink designs?
While it’s not strictly necessary to use a Cricut machine for cutting infusible ink designs, it’s a really great tool for this material.
You won’t be able to cut it so accurately and precisely by hand.
And the machine is specifically designed for this purpose.
Can I use infusible ink without mirroring the design if I’m using a different cutting machine?
No, you still need to mirror your design even if you’re using a different cutting machine.
The mirroring step is necessary for all infusible ink designs.
That way your final art or text will appear correctly on your blank material.
Which side of the infusible ink sheet should I place face down on the mat?
An infusible ink sheet should be placed the ink side up on the mat.
The liner should face down.
That’s because you only need to cut the ink layer without ruining the backing.
To wrap up, when you’re cutting Infusible Ink sheets with your Cricut machine, it’s super important to remember to mirror the design before cutting.
This just means flipping the image horizontally, so that it appears the right way when transferred onto your final product.
If you forget to flip the design, you might end up with a backwards image or text.
So take a quick second to double-check and make sure you’ve mirrored your artwork before you start cutting!

