How small can Cricut cut? This is a question that I get a lot, so let’s explore the answer together. Cricut machines are amazing units that can cut a variety of materials with great precision. However, there are limits to how small Cricut can cut.
In this blog post, we’ll explore those limits and how you can work around them.
How small can Cricut cut?
As anyone who’s used a Cricut knows, this fabulous machine can cut all sorts of materials with great precision – from paper to vinyl to fabric.
But there are limits to how small Cricut can cut.
The smallest design size the Cricut can cut is 1/4″.
As for the finest details the machine can handle, I’ve done a few test cuts and the smallest I was able to cut were circle shapes with a diameter of around 1.2 mm and lines about 0.3-0.4 mm thick.
The lowest font size Cricut can cut is also 1/4″.
How small Cricut can cut depends on the blade you use
Cricut machines can help you create beautiful, elaborate, and very detailed projects.
The level of detail that your Cricut can cut depends on the blade that you use.
Cricut is compatible with several different blades, and each one is designed for a specific purpose.
If you want to cut intricate designs, you will need to use a blade with the smallest possible diameter.
Fine Point Blade
There are several types of Cricut blades, but the Fine Point Blade is, as the name suggests, the finest one.
Its thickness is just 1.1 mm.
This blade can cut the smallest, thinnest, most delicate, and intricate lines, shapes, and fonts with no tearing or tagging.
It’s perfect for crafters who want to create small-scale, complicated, and detailed projects.
Knife Blade
On the other side of the spectrum is the Cricut Knife Blade.
It’s the strongest and most heavy-duty blade available.
This blade can cut through the thickest materials with ease, but it’s not able to handle delicate cuts and intricate details.
Keep in mind that the Knife Blade is generally best used for cuts of moderate complexity or detail, no smaller than 0.75″.
So this blade’s minimum cut size is 0.75″ x 0.75″ (includes interior and exterior cuts).
Plus, Cricut recommends keeping lines at least as thick as a standard wooden pencil when you’re using the Knife Blade.
However, some crafters report they’ve been able to get details as fine as 1/4″ successfully cut with this blade.
So if you need to cut something super-small or intricate, you’ll need to use the Fine Point blade.
But for handling tough materials like wood or leather, the Cricut Knife blade is the best option.
The level of detail also depends on the material
Cricut machines can cut a wide variety of materials, from paper to vinyl to fabric.
The size of the details and fonts that Cricut can cut depends on the material.
The thinner and easier to work with the material is, the finer details Cricut can cut.
How to cut small and intricate designs and tiny fonts with Cricut
If you’ve ever tried to cut small fonts or intricate designs with your Cricut machine, you know that it can be a frustrating experience. The cuts are often not as clean as you’d like, and the machine can sometimes end up tearing the material.
In this blog post, I’ll show you how to cut super-small stuff with your Cricut machine, using a few simple tips and tricks:
1. Use the Cricut Premium Fine Point Blade
As I’ve already mentioned above, Cricut’s Fine Point Blade is the perfect tool for cutting small, intricate details and fonts.
This blade is made of high-quality steel and is designed to cut through a variety of materials, including paper, vinyl, and cardstock.
It can handle even the most delicate lines and figures with ease.
With the Fine Point blade, you can create beautiful, unique, and complex projects that are sure to impress your friends and family.
2. Keep your tiny fonts simple
If you’re new to using Cricut, you might be wondering what kind of fonts work best with the machine, especially at a small scale.
There are a few things to keep in mind when choosing a font for your Cricut projects.
- First, consider the thickness of the font. Some fonts are very thin and will not cut well with Cricut.
- Second, think about the style of the font. Some fonts are very ornate and detailed and will not cut well either.
- Sans serif fonts are the best choice for cutting small texts with Cricut. They have a clean, modern look and feel that makes them easy to read and cut. Plus, they’re designed to be used in tiny sizes, so they’re perfect for cutting intricate designs.
- Finally, try different typefaces and do a test cut with each one using Cricut to see how it looks and cuts.
3. Keep the blade clean and sharp
One of the most important parts of getting a perfect cut is having a sharp, clean blade.
When it comes to cutting small fonts and intricate designs, a dull or dirty blade can ruin your project.
A clean blade will make smoother, more precise cuts.
Here are some tips for keeping your blade clean and sharp:
- To clean your Cricut fine point blade from cutting scraps and residue, first remove the blade from the machine.
- Next, using a soft cloth, gently wipe the blade to remove any debris.
- If necessary, you can use mild soap and water to remove any stubborn residue.
- Be sure to dry the blade completely before re-installing it.
4. How to sharpen the blade
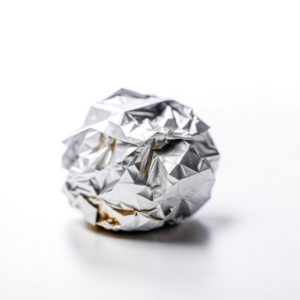
If your Cricut blade is not cutting as precisely as you would like, you can try sharpening it by stabbing a ball of foil with it:
- First, remove the blade from the housing.
- Next, take a small piece of heavy-duty aluminum foil and roll it into a ball.
- Then, stab the foil ball with the cutting edge of the blade a few times, just be careful not to injure yourself in the process.
- Finally, re-install the blade into the housing and test it out on some paper.
With a little bit of care, you can keep your Cricut Fine Point blade sharp and extend its life.
5. Use high-quality permanent vinyl for better results
As a seasoned crafter, I often use high-quality permanent vinyl for small details and intricate cuts.
I find that it is much easier to use for tiny cuts than lower quality vinyl or vinyl with lower stickiness, like removable or stencil vinyl, and the results are always clean and accurate.
Plus, removable or stencil vinyl snags and tears more often than permanent material that has a stronger adhesive.
In addition to that, stronger sticking power ensures that tiny details stay put on the liner and don’t lift when you’re weeding.
If you’re not sure which vinyl to use and are looking for a great material for tiny cuts, Oracal 651 is a great option!
It’s a permanent vinyl that comes in a wide variety of colors.
Oracal has a glossy finish and is water-resistant, making it ideal for indoor and outdoor use.
It’s also easy to weed, so you’ll be able to create those intricate designs without any hassle.
6. Use the “Washi Sheet” setting
If you’re working with small, intricate details or fonts, you’ll get better results using the “Washi Sheet” setting on your Cricut machine instead of the default vinyl setting.
This can really make a difference!
The Washi setting is designed for cutting thinner, more delicate materials like washi tape, washi sheets, and vellum.
They are thinner than vinyl, so it’s easier to cut small fonts and intricate designs with this speed and depth.
This will give you cleaner cuts and help to prevent the vinyl from tearing.
Washi sheets are one of the most popular papers used in scrapbooking and other paper crafts. They are made of natural fibers such as bamboo, hemp, or rice paper, and come in a variety of colors and patterns.
Washi sheets are characterized by their thinness, strength, and beautiful texture. In the past, washi sheets were used for a variety of purposes, including writing, painting, and wrapping.
Today, washi sheets are still used for many of these same purposes, but they have also become popular as a material for scrapbooking, origami, and other paper crafts.
With this setting, Cricut doesn’t cut through the backing, just like when you choose “Vinyl” on your machine, but the cut is more delicate and detailed.
Note that the Washi Sheet setting is unavailable on Cricut Joy.
You can try to reduce pressure on Cricut Joy to cut small designs instead.
7. Reduce the cutting speed
The speed at which the blade moves can also make a difference in the quality of your cuts.
If your Cricut machine has an option that allows you to adjust the cutting speed, you can get much cleaner cuts on small fonts and intricate designs if you slow it down.
8. Perform a test cut
If you want your Cricut cuts to turn out perfectly, it’s important to do a test cut before cutting the material.
This is especially true if the design is intricate and has small fonts.
By doing a test cut, you can ensure that all the details will be cut correctly and that the vinyl will be easy to weed properly.
How to weed a small Cricut cut
Weeding small fonts and intricate designs can be tricky.
However, with a little bit of patience and the right tools, you can weed even the most complicated cuts.
Here are a few tips to help you weed vinyl cuts with small details:
- Use a weeding tool with a sharp point to help you grab even the tiniest pieces of vinyl.
- Help yourself with tweezers if needed.
- Try reverse weeding from the transfer tape. This is a real lifesaver for working with small fonts and miniature pieces.
Here’s how it works:
- After cutting your design, place the transfer tape over your cut and slowly peel it off the backing.
- Carefully weed the negative space around and inside your letters or design, starting from the outside and working your way in.
- Then you’ll be left with your weeded design on the transfer tape.
- Now, all you have to do is place the transfer tape on your final project surface, burnish it, and carefully peel it off.
- Give this method a try the next time you’re weeding vinyl and see how much easier it is.
- If you’re having trouble seeing the design or cut lines, try using a light box, like Cricut BightPad, or holding the vinyl up to a light source, like a window.
- A magnifying glass is a very handy tool to have when weeding vinyl cuts with miniature fonts and lots of small details. By magnifying the area, you can see what you’re doing better and avoid making mistakes. This can save a lot of time and frustration, especially when working with complex designs.
- Take your time and be patient! Weeding can be hard, but it’s important to take your time to avoid ruining the design.
With these tips, weeding small and detailed vinyl cuts with tiny fonts will be a breeze!
How to transfer a Cricut cut with lots of small details
- Always use transfer tape
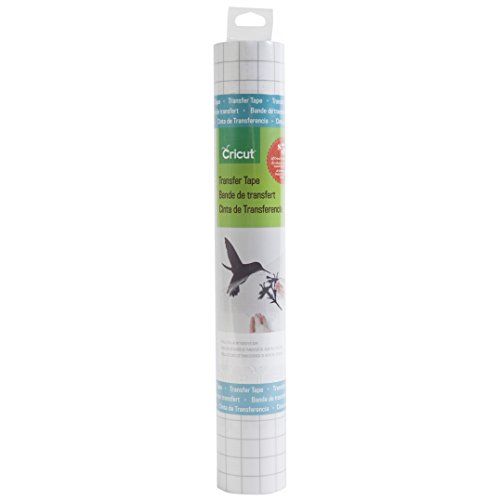
When working with vinyl cuts that have a lot of tiny, intricate details and minuscule fonts, it’s important to use transfer tape.
Not only does it help with reverse weeding, but it’s also the best way to ensure that your vinyl cuts will be transferred flawlessly, in one go instead of you having to move them painstakingly piece by piece.
Cricut’s own Standard Grip transfer tape works great.
Just make sure you don’t use the StrongGrip tape or you won’t be able to remove your design from it because it’s too sticky.
- Use a scraper several times
Use the scraper tool several times to rub the decal down to the surface, ensuring that the vinyl sticks really well before you pull the transfer tape away.
That way no detail will lift with the tape.
- Pull away transfer tape very slowly
When you are ready to remove the transfer tape from your vinyl design, be sure to do so slowly and carefully.
Pulling the tape away too quickly can cause the vinyl to come up with it, ruining your design.
Take your time and remove the tape slowly starting at one corner, being careful not to pull up any vinyl.
If the vinyl lifts place it back, burnish it down again and retry removing the tape.
Small and intricate Cricut project ideas
Here are a few ideas for Cricut projects using small, detailed, and intricate cuts and tiny fonts:
- Create a custom greeting card with an intricate design and a message in a small and detailed font.
- Add a special touch to letters, scrapbooks, and cards by cutting out small shapes or words to use as embellishments.
- Design and cut out an intricate, delicate paper ornament.
- Create a set of gift tags with lacy designs and tiny font messages.
- Show off your sense of humor by cutting out funny sayings or quotes and attaching them to your water bottle or laptop.
- Get creative and make a miniature sculpture by cutting out small pieces and assembling them into a work of art.
- Personalized stationery — this is a great way to use those tiny cuts and fonts to create a custom look for your stationery.
- Monogrammed home decor — add a personal touch to your home with monogrammed decor made using your Cricut and thin elaborate script fonts.
With a little practice, the right tools, and some patience, you can cut just about any design and level of detail you can imagine with your Cricut machine.
Whether you’re a beginner or a seasoned user, there are always new tips and tricks to learn with a Cricut cutting machine.
In this post, we’ve explored some of the ways you can get the most out of your machine for cutting small and detailed designs.


