Have you tried cutting cotton fabric with your Cricut Joy and struggled to find the right settings, dealing with fabric lift-offs, and the perpetual question of whether the Joy can truly conquer textiles? In this article, we’re diving straight into the heart of the matter – Can Cricut Joy cut cotton fabric?
I’ll spill the beans on the exact steps, no-nonsense solutions, and the insider tricks to make your Joy smoothly slice through that cotton.
Can Cricut Joy Cut Cotton Fabric?
While Cricut Joy might not have cotton fabric on its official materials list, it does have a hidden talent for cutting through thin bonded cotton with its Joy Fine Point blade.
1. Use Bonded Cotton Fabric.
Here’s the deal – your fabric needs a backing for use with the Joy Blade without any snagging.
You can buy thin cotton for quliting and apply interfacing to the back (or the wrong side) of your piece of fabric.
Light cotton is the best choice for this, and bonding is the key to a seamless performance.
2. Mat Matters

Cricut Joy doesn’t have a pink FabricGrip mat in its 4.5-inch width, but don’t fret.
The green StandardGrip mat is the go-to for cutting bonded cotton fabric.
Plus, there are other manufacturers out there crafting FabricGrip mats tailored specifically for your Joy’s size.
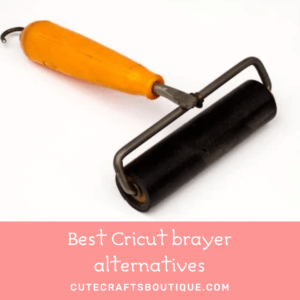
3. Use a Brayer
Before the cutting, a little prep is in order.
Use a brayer to ensure your fabric sticks to the mat and stays smooth.
This will help the fabric to stay firmly in place during the cutting process.
4. Choose the Faux Leather Setting
Cricut Joy might not have a cotton fabric setting, but it’s OK.
The “Faux Leather” setting is great for cutting fabrics.
It also works for cutting thin bonded felt with Cricut Joy.
5. Fine-Tune the Pressure
Last but not least, let’s talk pressure.
Finding the sweet spot is the secret sauce for the best results.
Adjust the pressure settings as needed to ensure your Joy glides through the fabric smoothly.
Cricut joy overview
Cricut Joy: The Creative Marvel
Cricut Joy is a compact cutting machine that’s like a pocket-sized magician for your crafting dreams.
It’s designed to bring simplicity and versatility to your projects.
You can use it to create custom labels, cards, or adding a personal touch to various materials.
On-the-Go Magic: Portability Matters
Ever wished you could carry your crafting magic wherever you go?
That’s where Cricut Joy shines.
Its portability means you can transform any space into a craft room, whether you’re at home or traveling.
Quick Setup: Ideal for Beginners
Cricut Joy offers a quick and hassle-free setup.
So this machine is perfect for beginners.
No need to fuss over a plethora of settings.
Just prepare the design, load your material onto a mat, choose the appropriate presets, and let Joy work its magic.
Limitations: A Reality Check
Cricut Joy, despite all its abilities, does have some limitations.
One of the main factors is its size – it’s a smaller machine compared to its counterparts.
This means it’s not equipped with all the bells and whistles that larger Cricut machines might have.
When it comes to cutting materials, Joy has its official list, and sadly, cotton fabric or felt aren’t on it.
And, unlike its bigger siblings, it lacks a dedicated fabric blade and mat.
But fear not! Joy can still pull off a fabric-cutting trick with its Fine Point blade, especially when dealing with thin bonded fabrics.
So, in essence, Cricut Joy’s limitations are more like speed bumps – they might slow you down a bit, but they won’t stop the creative journey.
It’s a trade-off for the compact, portable, and user-friendly design that makes Joy a delight for quick, on-the-go projects.
How to cut cotton fabric with Cricut Joy
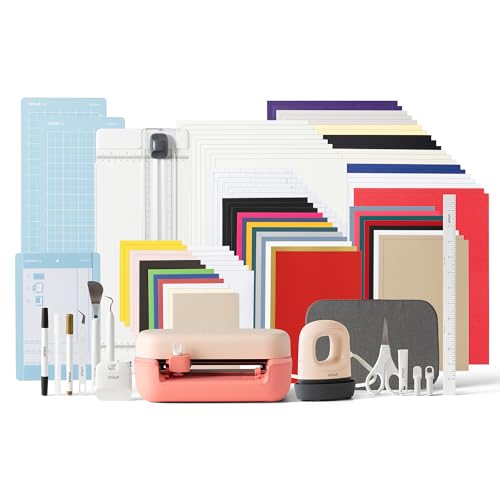
Tools and Supplies Guide
1. Cricut Joy Machine
This compact marvel is your creative powerhouse, ready to turn your fabric dreams into reality.
2. Joy Blade
While Joy may not boast a dedicated fabric blade, this versatile tool steps up to effortlessly cut through thin bonded cotton, bringing precision and finesse to your fabric projects.
3. Standard Grip Mat (Green)
For cutting cotton fabric, the green StandardGrip Mat makes a great and stable base.
It ensures your fabric stays firmly in place during the cutting process, providing stability and precision to each cut.
Alternatively, use a fabric mat made for Joy by other manufacturers.
4. Interfacing

Prepare your cotton fabric for cutting by applying interfacing to the back (or wrong) side.
This backing allows the blade to glide through without hiccups.
It’s the key to a seamless and smooth performance.
5. Brayer
Use a brayer when loading the fabric onto the mat.
This nifty tool helps your cotton stick to the mat, preventing any unexpected moves during the cutting process.
A quick roll with the brayer ensures a secure and flawless setup.
6. Light Cotton Fabric:
Choose your fabric wisely, and in this case, the best one is light cotton fabric.
Its delicate nature pairs perfectly with the thin Joy blade.
Preparing Fabric for Cricut Joy: How to Bond Cotton Fabric with Interfacing
1. Gather Your Materials
Before diving into the bonding process, ensure you have everything on hand.
You’ll need your light cotton fabric, interfacing, an iron, press cloth, and a fabric cutter or scissors.
2. Cut Interfacing to Size
Lay your cotton fabric on a clean, flat surface and cut the interfacing to roughly match the dimensions of your fabric piece.
3. Iron the Cotton Fabric
Lay your fabric piece on your work surface.
Give your cotton fabric a quick ironing session.
This not only removes any wrinkles but also preps the fabric for better interfacing adhesion.
Smooth fabric equals a smoother bonding process.
4. Position Interfacing on Fabric
Place the interfacing adhesive side down on the back or wrong side of your cotton fabric.
Take a moment to ensure that the interfacing covers the entire fabric surface and is lined-up well.
Cover with a damp press cloth.
5. Iron the Bond
Fire up your iron to the appropriate setting for the interfacing material.
With steady hands and gentle pressure, press each section of the fabric and interfacing for 15 seconds.
Then lift and press the next section.
Keep pressing until you’ve covered the entire surface.
This creates a strong bond, turning your cotton fabric into a duo ready for the Cricut Joy stage.
6. Allow Cooling Time
Resist the urge to rush to the next step.
Allow the bonded fabric to cool completely.
This cooling-off period ensures that the bond sets securely, creating a sturdy foundation for the cutting performance.
7. Perform a Fabric Check
Once the fabric is cool, perform a quick fabric check.
Make sure that the interfacing has adhered evenly across the entire surface.
How to use Cricut Joy to cut bonded cotton fabric
1. Load the Standard Grip Mat:
Begin by placing your green Standard Grip Mat on a clean, flat surface.
Ensure it’s free from dust or debris, providing a pristine stage for your bonded cotton fabric.
2. Secure Bonded Fabric to Mat:
Lay your bonded cotton fabric over the mat and align it to the top left corner and grid lines of the mat.
Use a brayer to ensure a secure grip on the mat.
Roll the brayer over the fabric, making it adhere firmly.
You want that fabric to stay put during the cutting process.
3. Insert the Mat into Cricut Joy:
Load the mat into the machine.
Align the mat with the guides and let the rollers grip it.
4. Select the Material:
Since there’s no specific setting for cotton fabric, choose the “Faux Leather” setting on your Cricut Joy.
The Joy is now prepped and ready to bring your design to life.
5. Fine-Tune Pressure Settings:
Fine-tune the pressure settings if needed.
6. Start the Cutting Process:
Press the “Go” button on your Cricut Joy, and watch the magic unfold.
The Fine Point Blade will dance across the bonded cotton fabric, cutting your design with precision.
7. Unload the Mat:
Once the cutting is complete, select the Unload in Design Space and remove the mat from your Cricut Joy.
Peel away the excess fabric, revealing your beautifully cut bonded cotton creation.
Can I use any type of cotton fabric with Cricut Joy?
While Cricut Joy excels at cutting thin bonded cotton fabric, use light cotton for best results.
This will help the Joy Blade cut it with ease.
Is the “Faux Leather” setting the only option for cutting cotton fabric?
While there isn’t a specific cotton fabric setting, I’ve found “Faux Leather” setting works for me.
It has the right balance of pressure and blade movement for a clean cut.
Feel free to experiment, but this setting is a reliable starting point.
Can I re-use the StandardGrip mat for multiple fabric-cutting projects?
Yes, this mat can be reused for multiple projects.
Just keep it clean and sticky.
If you’re planning to cut fabric often, set aside an old mat just for textile projects because fabric can leave lint.
And use a newer mat for vinyl, etc.
Can I cut multiple layers of bonded cotton fabric at once?
No, you can only cut one layer at a time.
Cutting multiple layers may compromise the precision of the cuts and put undue strain on the machine.
If you need to cut several layers often consider getting Cricut Maker and the Rotary Blade.
It can cut up to 3 layers of thin fabric with no bonding necessary.
Is there a specific direction the fabric should face on the mat?
Place your bonded fabric with the interfacing side down on the mat.
This ensures that the Fine Point Blade interacts with the fabric’s right side during the cutting process.
Can I wash the bonded cotton fabric after cutting?
Yes, you can wash bonded cotton fabric after cutting.
However, keep in mind the specific interfacing you’ve used, as some may have special washing instructions.
Generally, a gentle cycle and air-drying are best.
How do I troubleshoot if my Cricut Joy is not cutting through the cotton fabric properly?
If you get cutting issues, first check the blade for any debris.
Make ensure it’s sharp and is securely in place.
Check that the fabric is well-bonded and properly secured to the mat.
Experiment with adjusting pressure settings and consider replacing the blade if necessary.
Are there specific designs for Cricut Joy better suited for bonded cotton fabric?
The joy blade can cut intricate and detailed designs on stuff like vinyl.
But be mindful of the fabric’s limitations.
Fine details may be challenging because the blade may snag on the fibers and small pieces can fray.
Keep the design simple for best results.
Final thoughts
So, can the Cricut Joy cut cotton fabric?
While it may not be on the official materials list and lacks a dedicated fabric blade and mat, the Joy can still surprise us with its versatility.
With the right settings and materials, it can successfully cut thin and bonded cotton fabric.
So go ahead and let your creativity flow with the Cricut Joy, even if it means thinking outside the box a little.