Do you want to try personalizing your plastic cups with Heat Transfer Vinyl (HTV)? Be careful! It may lead to a disaster! Cups can melt, and your designs will get ruined.
But fear not, I’ve got the scoop on why this happens and a simple solution that’ll save your cups.
Can You Use Heat Transfer Vinyl (HTV) on Plastic Cups?
No, it’s a bad idea.
Here’s why (plus a great alternative):
1. Temperature Matters:
The heat transfer vinyl (HTV) requires high temperatures, between 260 °F to 315 °F (130 °C to 160 °C), plus pressure, to stick properly.
Plastic cups are sturdy for daily use. But they may not stand high heat along with pressure.
2. The Risk of Damage:
The heat required for HTV can spell trouble for plastic cups, warping them, or even causing them to melt.
This will harm your cherished drinkware and ruin your vinyl creation.
3. The Best Alternative –Adhesive Cricut Vinyl:

To rescue your plastic cups and vinyl designs, the smarter choice is to use adhesive Cricut vinyl.
This material doesn’t demand scorching temperatures.
You can simply stick it onto a cup and smooth it out.
You have two main options here:
Permanent Adhesive Vinyl:

This one’s for the long haul.
It creates a durable, long-lasting decal that can withstand the regular washing and daily use.
Removable Adhesive Vinyl:
If you’re into temporary flair, this is your choice.
It allows you to change your cup’s look as often as you change your mind.
It’s like a wardrobe for your cups.
But this vinyl may not survive even one wash.
In summary, while HTV is a fantastic choice for fabric and textiles, it’s a mismatch for plastic cups due to the extreme heat requirements.
Instead, opt for adhesive vinyl, which offers durability and a spectrum of creative options.
Using Permanent Adhesive Vinyl Instead of Heat Transfer Vinyl for Plastic Cups
Now, if you’re set on decorating your plastic cups for the long term, permanent adhesive vinyl is the go-to option.
It’s the most recommended type for cups because it sticks around through thick and thin, be it hot drinks or cold beverages.
Let’s dive deeper into why permanent adhesive vinyl is the best option for decorating plastic cups:
1. Durability:
Permanent adhesive vinyl lives up to its name.
It’s designed to stick around for the long haul, even in challenging conditions.
When you’re decorating plastic cups, durability is key.
These cups often face exposure to liquids, varying temperatures, and the rough-and-tumble of daily life.
Permanent vinyl won’t budge, ensuring your designs stay vibrant and intact.
2. Handwash Friendly:
One of the primary perks of using permanent adhesive vinyl on plastic cups is its ability to withstand handwashing.
This vinyl can take the occasional scrub with soapy water and a soft cloth. And your designs will stay looking great.
3. Fade Resistance:
If you’re crafting a design that you want to stand the test of time, permanent vinyl is the way to go.
It’s highly resistant to fading.
Your plastic cups remain as eye-catching as the day you decorated them.
UV rays, handwashing, and the general wear and tear of daily use won’t easily dull its colors.
4. Versatile Design Options:
Permanent adhesive vinyl comes in a wide variety of colors and finishes.
So you can get as creative as you want with your cup designs.
You can find it in various styles, such as patterned, glittery, holographic, glow-in-the-dark, reflective, etc.
Your cups can truly become unique pieces of art and will make lovely gifts.
5. Adhesion Quality:
The adhesive on permanent vinyl is specially formulated for long-term bonding.
It sticks firmly to the surface of plastic cups without peeling or lifting over time.
You won’t have to worry about your vinyl decals coming loose and ruining your design.
6. Ease of Application:
Applying permanent adhesive vinyl is a straightforward process.
Unlike heat transfer vinyl, it doesn’t need a mug press. You can simply stick it to your plastic cups.
Just use transfer tape to help you with precise placement and smooth adhesion.
Once it’s on, it’s on for good, giving you peace of mind that your designs won’t accidentally shift or tear.
Can you put permanent vinyl decals on plastic cups in a dishwasher?
Permanent vinyl decals on plastic cups are not dishwasher-safe.
It’s best to handwash your decorated mug for longevity.
Here’s why:
1. Heat and Pressure:
Dishwashers are designed to clean and sanitize your dishes thoroughly.
They use a combination of hot water, detergent, and strong water pressure.
While these elements are excellent for cleaning, they can be harsh on delicate materials like vinyl.
2. Adhesive Integrity:
Permanent adhesive vinyl relies on a strong bond between the vinyl material and the cup’s surface.
The high heat and pressure in a dishwasher can weaken this bond over time.
As the adhesive softens due to the heat, it can make the vinyl decals peel or curl at the edges.
This will ruin your design.
3. Detergent Chemicals:
Dishwasher detergents often contain strong chemicals and abrasives to remove tough food residues and stains.
These chemicals can make your permanent vinyl decal deteriorate over time.
They will cause discoloration, fading, or even distortion of your vinyl decals.
4. Mechanical Agitation:
Dishwasher uses spray arms and high-pressure water jets, which can cause friction and abrasion against the vinyl decals.
This constant rubbing can wear down the surface of the vinyl, resulting in a loss of visual appeal.
5. Longevity of Your Design:
If you want your vinyl decals to stay vibrant and beautiful, it’s best to handwash your cups.
Handwashing lets you control the temperature, use gentle detergents, and avoid the mechanical stresses of a dishwasher.
So this will preserve your designs for a longer period.
How to apply vinyl to plastic cups
Tools and supplies
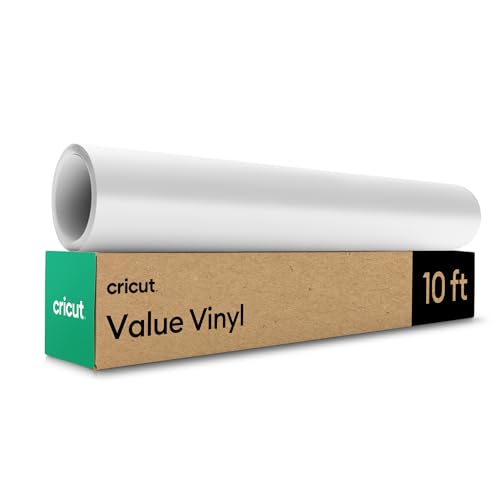
1. Permanent Adhesive Vinyl:
Choose the Cricut permanent adhesive vinyl in the color and finish that you like. Or get one that makes a nice contrast to your cup blank.
2. Weeding Tool:
This tool will help you to remove the excess vinyl (referred to as “weeding”) after your design has been cut.
Weeding tools usually include a weeding hook or a pair of fine-point tweezers.
3. Cricut Machine:
You’ll need a Cricut cutting machine, such as a Cricut Explore or Cricut Maker, to cut your vinyl designs accurately.
Make sure it’s in good working condition.
4. StandardGrip Mat:
You’ll also need the appropriate cutting mat.
StandardGrip mats work well for most vinyl projects, including heavier glitter vinyl.
5. Cricut Design Software:
Use Cricut Design Space to create and customize your vinyl designs.
You can get this software online, so you’ll need a computer or mobile device with internet access.
6. Transfer Tape:
Transfer tape is necessary for transferring your cut vinyl design to your cup.
It helps with precise placement too.
7. Plastic Cup:
Select a clean plastic cup with a smooth, even surface for your vinyl application.
Before you apply your decal, make sure it’s free from dust, grease, or any residue that could affect adhesion.
8. Cleaning Supplies:
You’ll need rubbing alcohol or a mild soap and water solution, along with a lint-free cloth or paper towels, to clean the cup’s surface before applying the vinyl.
This step is crucial for proper adhesion.
9. Squeegee or Burnishing Tool:
A squeegee or a burnishing tool is used to firmly press the vinyl onto the cup.
It will remove any air bubbles and create a smooth, secure bond.
How to apply vinyl to plastic cups step-by-step
Step 1: Design Your Vinyl Decal:
Use Cricut Design Space to create or select your vinyl design.
Make sure that the dimensions match the size of your plastic cup.
Once you’re happy with your design, send it to your Cricut machine for cutting.
Step 2: Load and Cut Vinyl:
Place your permanent adhesive vinyl onto the StandardGrip mat and load it into the Cricut machine.
Follow the machine’s instructions to cut your design accurately.
Step 3: Weed the Vinyl:
After the cutting process is complete, use weeding tools to remove the excess vinyl, leaving only your design on the backing sheet.
Take your time to do it carefully.
Step 4: Clean the Cup:
Clean the surface of your plastic cup using rubbing alcohol or a mild soap and water solution.
Wipe it dry with a lint-free cloth or paper towels to remove any dust, grease, or residue that could affect adhesion.
Step 5: Apply Transfer Tape:
Cut a piece of transfer tape slightly larger than your vinyl design.
Carefully place it over your vinyl, smoothing out any air bubbles with a squeegee or burnishing tool.
Step 6: Transfer the Design:
Gently lift the vinyl and transfer tape from the backing sheet.
Align the design on your plastic cup.
Make sure it’s centered and positioned as desired.
Use the squeegee or burnishing tool to firmly press the vinyl onto the cup, removing any air bubbles.
Work from the center outwards for a smooth application.
Step 7: Remove Transfer Tape:
Slowly peel away the transfer tape at a 45-degree angle.
Check whether your vinyl design adheres to the cup’s surface.
If any part of the vinyl begins to lift, press it down again and continue removing the transfer tape.
Step 8. Allow to Set:
Give your vinyl some time to cure and set on the cup before washing it.
It may take a few hours or even a whole day for the adhesive to fully bond.
And there you have it! Your plastic cup is now beautifully decorated with permanent adhesive vinyl.
How can I clean the cup with the vinyl design after use?
Use a mild soap and water solution to wash your cup.
Avoid abrasive scrubbing and harsh cleaning agents to preserve the vinyl’s appearance.
Can I layer permanent vinyl on the cup for a more complex design?
Yes, you can layer permanent vinyl to create multicolored or intricate designs on your cup.
Make sure that each layer is well-bonded to the cup before applying the next.
Also, keep in mind that additional layers may not withstand washing as well as a one-layer design.
How long should I wait before using the cup after applying the vinyl?
It’s recommended to allow the vinyl to set for at least a few hours to a day before using the cup.
This gives the adhesive time to bond securely to the cup’s surface.
What if my vinyl doesn’t adhere properly to the cup?
If you have adhesion issues, carefully reapply the vinyl and use a squeegee or burnishing tool to press it down.
Plus, make sure the cup is clean and dry before reattempting.
Is it safe to drink from a cup with permanent vinyl decals?
Yes, it’s safe to drink from a cup with permanent vinyl decals as long as the vinyl is applied correctly, and the cup is clean.
Vinyl does not typically come into direct contact with the contents of the cup.
How can I remove permanent adhesive vinyl from a cup if I want to change the design?
Removing permanent vinyl can be challenging, and it may leave residue.
You can use a heat gun or hair dryer to warm the vinyl, making it easier to peel off.
Then, use adhesive remover to clean any residue.
Can I use permanent adhesive vinyl on textured or uneven plastic cups?
It’s best to apply vinyl to smooth, even surfaces.
Textured or uneven cups won’t provide a good surface for vinyl adhesion.
And the design may not stick well.
Is it necessary to seal or protect the vinyl design after applying it to the cup?
Generally, it’s not absolutely necessary to seal or protect permanent adhesive vinyl on plastic cups.
If you apply it properly and handwash it carefully, it will stay fine.
What’s the best way to store cups with vinyl decals to prevent damage or peeling?
Store cups with vinyl decals upright and away from direct sunlight.
Avoid stacking them and don’t let them come into contact with abrasive surfaces to prevent damage or peeling.
Can I put my vinyl-decorated cup in the freezer or microwave?
Avoid doing that because extreme temperature changes can affect the vinyl’s adhesion and appearance.
Can I apply vinyl to a cup that I plan to use for hot beverages?
Yes, just make sure that the cup’s material can withstand the heat.
Final thoughts
In conclusion, while it may be tempting to use heat transfer vinyl on plastic cups, it’s important to use the right materials for the job.
High temperatures and pressure can cause plastic cups to warp or melt, resulting in a less-than-desirable finished product.
Instead, opt for permanent adhesive vinyl to ensure a durable and long-lasting design on your plastic cups.
This simple switch will save you time and frustration in the long run.