InInfusible ink is a new sublimation technology that you can use with your Cricut. It lets you make beautiful and long-lasting designs on all sorts of materials. A lot of people use it on fabrics, but did you know you can also use it on wood? In this article, we’ll take a look at how you can use infusible ink on wood.
I’ll go over all the tools and materials you’ll need to make your project a success!
Infusible ink overview
Infusible ink is a special type of heat-transfer medium that works its magic by becoming one with the material, instead of just sitting on the surface like other traditional methods.
The ink is designed to react to heat, transforming from a solid to a gas without turning into a liquid.
The gas permeates the surface of a compatible item, merging with its fibers at a molecular level and becoming a permanent part of the material.
It’s like magic, but it’s all about chemistry!
Infusible ink works best on materials with a high polyester count or items that have a polymer coating, such as certain heat-resistant ceramics and fabrics.
The ink needs that polymer coating to bond effectively and create long-lasting results.
Does Infusible Ink Work on Wood?

Yes! Even though wood doesn’t have any polymer coating, which is what infusible ink typically works best on, it can still be used with this medium.
How does it work? Well, it’s all about the porous nature of wood.
The ink actually sinks into the surface of untreated wood.
The finished piece will have a slightly weathered look that can add character and charm to your projects.
It’s the perfect combination of rustic and modern.
Wood is an incredibly versatile canvas for infusible ink.
And with infusible ink, you can personalize home decor, create custom wooden signs, make stunning wall art, unique furniture and so much more.
How to use Cricut infusible ink on wood?
Using infusible ink on wood is surprisingly easy.
All you need is a smooth and clean untreated piece of wood.
Its porous surface will allow the ink to sink in and become a permanent part of it.
Cut or draw your design using a Cricut machine.
This guarantees sharp edges and perfect lines.
Then, use a heat press to transfer the ink onto the wood.
I highly recommend using Cricut EasyPress for even and consistent heat distribution.
It’s a very convenient unit for wood pieces.
Now, here’s the important part:
If you want your infusible ink design to last on wood, you’ll need to seal it on the surface.
One great way to do this is by applying a protective coat of Mod Podge or a similar finish.
This step helps the ink stay securely locked into the wood, preventing any fading or peeling.
Once the ink is infused into the wood and sealed, it’s there to stay.
By taking this extra precaution, you can enjoy your creative masterpiece for a long time to come.
Here’s the process explained in more detail:
What you will need
Here’s a rundown of everything you’ll need to create projects with infusible ink on wood:
1. Cricut Infusible Ink:
Get infusible ink sheets or pens.
I recommend using infusible inks or pens manufactured by Cricut because they are perfectly compatible with this cutting machine.
They come in a wide range of vibrant colors and patterns.
I love the Galaxy ones:

These sheets have a lovely gradient effect, which looks amazing with a slightly weathered appearance you get on wood.
2. Cricut Machine
A Cricut machine is essential for cutting or drawing your designs with precision.
Infusible inks are compatible with all Cricut units — Cricut Explore, Maker, or Joy.
3. Wood Surface
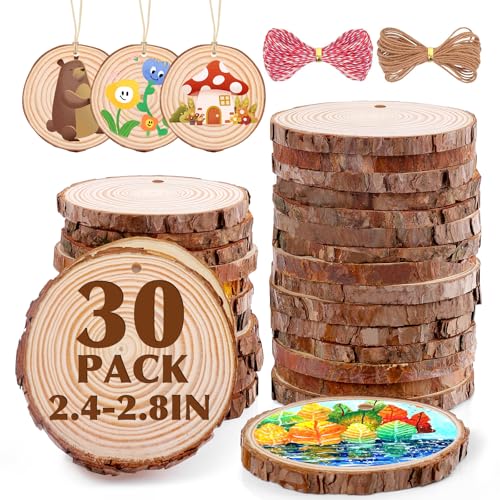
Find a light-colored smooth piece of untreated wood as your canvas.
It could be a wooden plank, a slice of wood, a coaster, or anything you want to jazz up.
Just make sure it’s clean and ready for your creativity.
4. Heat-Resistant Tape
Keep things in place by using heat-resistant tape to secure the infusible ink transfer onto the wood surface.
This will ensure that your design won’t budge during the heat application process.
5. Heat Press or Cricut EasyPress
Get your hands on a heat press or Cricut EasyPress to apply heat evenly and transfer the ink onto the wood.
These tools make sure your design stays put and looks amazing.
6. Butcher Paper
Before applying heat, lay down a protective cover sheet of butcher paper.
It will shield your project from any unwanted heat marks or stains.
And it’ll also protect the heat press plate from accidental transfer.
7. Heat-Resistant Gloves
Safety first! You may need to keep your hands protected with heat-resistant gloves.
Especially when handling heated wood or the heat press.
8. Mod Podge
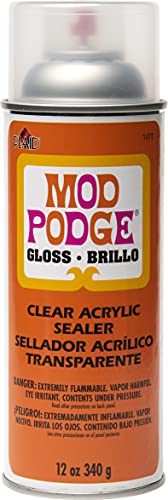
Once your infusible ink design is heat-set, give it some extra love by sealing it with Mod Podge or a similar sealer.
This step will help your masterpiece stay vibrant and protected on the wood surface.
9. Lint Roller or Microfiber Cloth
Start with a clean blank by using a lint roller or microfiber cloth to remove any dust or debris from the wood surface.
This will help you create a smooth and flawless working area.
10. Laser copy paper for infusible ink pens or markers
If you’re using infusible ink pens or markers, you’ll also need to get a sheet of laser copy paper.
This material will serve as the canvas for drawing your design with Cricut.
Ordinary copy paper won’t do because you need a heat-resistant sheet to transfer the drawing with a heat press.
And laser copy paper is heat-resistant, so it’s ideal for infusible ink.
How to use infusible ink on wood step by step
Step 1: Gather Your Materials
Collect all the necessary materials:
- Cricut infusible ink sheets or pens.
- Cricut machine.
- Smooth wood surface.
- Heat-resistant tape.
- Heat press like EasyPress.
- Protective butcher paper.
- Laser copy paper in case you’re using infusible ink pens or markers.
- Heat-resistant gloves.
- Mod Podge or a similar sealer.
- Lint roller and/or microfiber cloth.
Step 2: Design and Cut
Create your desired artwork, logo, or text using Cricut Design Space or any compatible software.
Once you’re happy with your design, use your Cricut machine to cut it out on the appropriate setting for infusible ink.
Or insert an infusible ink pen or marker into the machine’s Clamp A.
Then set your Cricut up to draw your design on laser copy paper.
Step 3: Prep the Wood Surface
Make sure the wood surface is clean and free from any dust or debris.
Use a lint roller or a microfiber cloth to remove any loose particles.
This will provide a smooth and clean canvas for your project.
Step 4: Secure the Infusible Ink Transfer
Position your cut infusible ink design or laser copy paper sheet on the wood surface.
Secure it in place using heat-resistant tape.
This will prevent it from moving during the transfer process.
Step 5: Heat Application
Set up your heat press or EasyPress according to the manufacturer’s instructions.
Preheat it to the recommended temperature for the ink and the blank.
Follow the amazing Cricut Heat Guide for the specific infusible ink product you’re using.
Place a protective sheet of butcher paper over the design and wood surface.
Then position your heat press or EasyPress on top.
Step 6: Apply Heat
Apply firm and even pressure with your heat press or EasyPress for the recommended time.
The heat will transfer the ink onto the wood surface.
Step 7: Cool and Remove
Once the recommended transfer time has passed, carefully remove the heat press or EasyPress.
Let the wood and your design cool completely before removing butcher paper, tape and the transfer sheet/laser copy paper sheet.
Patience is key!
Step 8: Seal with Mod Podge
Once the wood and design are cool, apply a thin, even layer of Mod Podge or a similar sealer over the entire surface.
This will help to protect the ink and seal it onto the wood for durability and longevity.
Step 9: Enjoy Your Masterpiece!
Allow the Mod Podge to dry completely, following the manufacturer’s instructions.
Once dry, your infusible ink design on wood is ready to be displayed, admired, and enjoyed.
Remember, practice makes perfect, so don’t be discouraged if your first attempt isn’t flawless.
With each project, you’ll gain more experience and skill in using infusible ink on wood.
So have fun, let your creativity flow, and enjoy the amazing results of infusible ink on wood!
Can I use any type of wood for infusible ink projects?
It’s best to choose smooth, untreated wood surfaces for best results.
Hardwoods like birch or maple work well.
Avoid using woods with heavy grain or rough textures, because this may affect the transfer of the ink.
Do I need to treat or prepare the wood surface before applying infusible ink?
No, you don’t need to treat or prepare the wood surface with any special products.
However, make sure the wood is clean and free from dust or debris before starting your project.
Can I use infusible ink on stained, varnished, or painted wood?
No, the ink has to infuse into the wood fibers.
So painted, varnished, or stained wood surfaces may prevent proper ink absorption.
Stick to untreated wood surfaces for the best results.
How do I create a long-lasting design on wood?
After applying the infusible ink, always seal the design with a product like Mod Podge or a similar sealer.
This will help you protect the ink from fading, moisture, and general wear and tear.
Can I wash or clean infusible ink designs on wood?
Yes! Infusible ink designs on wood are permanent and can be cleaned gently with a damp cloth, especially after you seal them.
Just avoid using harsh chemicals or abrasive cleaners that could damage the design.
Can I use infusible ink on wood that has already been sealed?
No, avoid applying infusible ink on wood surfaces that have already been sealed.
The ink needs to infuse into the wood fibers.
And a pre-existing sealant may hinder the transfer process.
How do I prevent the wood from warping or bending during the heat application?
Using a proper heat press or EasyPress with even heat distribution helps minimize the risk of warping or bending.
Plus, secure your piece of wood firmly in place during the heat transfer process.
Can I layer infusible ink designs on wood?
No layering may result in poor ink absorption and a muddy outcome.
This is because all the layers will turn to gas and mix during each heat application.
Stick to single-layer designs for the best results.
Can I use infusible ink on rough or textured wood surfaces?
No, the ink may not transfer evenly onto rough or textured surfaces.
Use a smooth piece of wood.
Can I use a regular iron instead of a heat press or EasyPress?
No, the temperature and heat distribution of a regular iron may not be as even as with a heat press or EasyPress.
So you’ll get a wonky transfer.
Should I sand the wood surface before applying infusible ink?
This isn’t necessary.
In fact, sanding can create uneven textures that may impact the ink transfer.
Just use a smooth, clean wood surface for your transfer.
Can I use infusible ink on wood with a natural wood grain pattern?
It’s fine to use it on wood that has a natural grain pattern.
The ink will fuse into the wood fibers, which will give you a nice one-of-a-kind effect, incorporating the natural wood grain into your design.
Can I use infusible ink on wood projects that will be exposed to outdoor elements?
Infusible ink isn’t really meant to be used outdoors for long periods of time.
But, if you do want to use it outside, make sure to protect it with a sealant or varnish that’s made specifically for outdoor use.
That way, it’ll last longer.
How can I fix any mistakes or imperfections in my infusible ink design on wood?
Infusible ink becomes a permanent part of the wood surface.
So it’s hard to remove or fix mistakes once you’ve applied it.
However, you can try sanding the wood lightly to remove the unwanted ink.
If you’re looking for a fun and creative project, using infusible ink on wood is a great option!
You can make personalized signs or unique home decor that looks amazing and lasts a long time.
Just follow the simple steps in this guide.