If you’ve ever worked with Cricut vinyl, you know that one of the most frustrating parts is getting the transfer tape off. Sometimes it seems like no matter how carefully you peel it, half of the vinyl design comes up with the tape. That can happen if your Cricut transfer tape is too sticky.
It’s a common problem but what can you do in this case? Let’s explore some of the options for dealing with extra-adhesive Cricut vinyl transfer tape.
What is Cricut transfer tape?
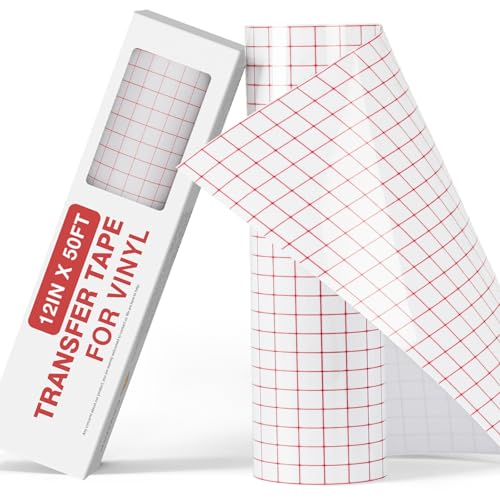
When you are working with vinyl, whether you are creating a sign or decorating a window, you need to use transfer tape.
Transfer tape is a clear or translucent adhesive film that is used to move vinyl graphics from the backing paper to another surface.
This is a necessary step in the vinyl cutting process, and it ensures that your intricate vinyl designs, especially ones that consist of multiple pieces, are transferred perfectly to your project surface in one go.
Since transfer tape is clear, you can see where you are placing the vinyl on your project.
The adhesive side of the tape holds the vinyl in place while you’re moving it.
If it’s too sticky, it can be difficult to part the vinyl and the tape.
Disadvantages of overly sticky Cricut transfer tape
If you’ve ever used transfer tape with your Cricut vinyl projects, you know that sometimes the sticky stuff is a pain to work with.
It can be hard to remove from the surface of your vinyl design, and it can also be difficult to reposition.
In addition to that, it often causes the vinyl to curl up or even tear.
This is always frustrating, especially when you’ve spent a lot of time creating your design.
If you’re not careful, you can end up with a big mess.
What to do if my Cricut transfer tape is too sticky?
If you’re having trouble with your transfer tape being too sticky, there are a few things you can try:
1. Check whether you’re using the StrongGrip type of transfer tape instead of the regular StandardGrip tape
First, you can try using a less sticky type of transfer tape.
If you’re new to vinyl crafts, you might not know that Cricut makes two main types of transfer tape: the super-sicky StrongGrip one and the regular aka Standard Grip one.
StrongGrip transfer tape is specifically designed for use with glitter vinyl, while regular transfer tape can be used with any type of vinyl.
The difference between these two kinds of tape is that the StrongGrip one is a lot stickier and has a stronger adhesive that can hold onto a textured surface like glitter vinyl better.
So if the material you’re using is not glitter vinyl switch to Standard Grip transfer tape instead.

There are a few ways to tell the difference:
- First, take a look at the vinyl packaging itself. StrongGrip vinyl will have a label signifying that it is the stronger variety of tape.
- Next, test the tape’s stickiness. StrongGrip tape is designed to provide a more powerful hold for vinyl transfers, so it should be more sticky.
- Finally, try applying the tape to a piece of vinyl. If the tape pulls the vinyl away from the backing paper too easily, it’s probably StrongGrip.
2. De-stick your tape
If your Cricut vinyl transfer tape is still too sticky, you can de-stick it by adhering it to your clothes like jeans, tee, or a denim shirt.
You can also try sticking it to a fuzzy blanket or anything else with a slightly fuzzy surface.
The fabric or fuzz will make the adhesive less strong.
Alternatively, you can try applying a thin layer of baby powder or cornstarch to the adhesive side of the tape. This will help to reduce the stickiness and make it easier to work with.
Or try chilling the tape in the fridge for an hour or so. This will make it less sticky and easier to work with.
These all are quick and easy fixes that will help you to continue using your Cricut vinyl transfer tape.
3. Clean the surface you’re applying vinyl to with rubbing alcohol
To ensure that your vinyl decal sticks to your chosen surface and doesn’t lift together with the sticky transfer tape, clean the area where you’ll be applying the decal with Isopropyl alcohol or any other rubbing alcohol.
This will help to remove any oils, dirt, dust, or other debris that could prevent the decal from adhering properly.
Just be sure to let the surface dry completely before applying the decal.
4. Use contact paper instead of transfer tape
Again, one of the most important things when working with Cricut vinyl is to use the right type of transfer tape.
But did you know that you can use contact paper instead of transfer tape?
Contact paper is a type of thin, paper-like material that is typically used for covering surfaces.
It is usually coated with a pressure-sensitive adhesive, which allows it to stick to any surface without the need for glue.
It is commonly used to line shelves and drawers, protect furniture from spills and scratches, and decorate walls.
Contact paper is available in a wide variety of colors, patterns, and textures, making it a popular choice for many different applications.
When it comes to using contact paper instead of transfer tape for transferring Cricut vinyl, there are pros and cons to each method.
Here’s a breakdown of the two methods so you can decide which is best for your project.
Contact paper is often the more budget-friendly option and is available at most craft stores and on Amazon.
However, it can be difficult to get the vinyl to stick to the paper, and it may be hard to line up the vinyl on the paper as it’s not always transparent and rarely has a convenient grid.
Transfer tape is easier to use in most cases. The vinyl sticks to the tape better, and you can painlessly line up your decal on the surface thanks to the tape being clear and having a grid.
When it comes to stickiness, contact paper is less tacky and can be a good alternative to a transfer tape that is too sticky.
Just choose the clear type of this tape and press it harder to help it pick up your vinyl decal.
Check out the Con-Tact Brand Clear Matte contact paper, which is clear and lets you line up your decal on the chosen surface too. Plus, it’s reusable.

It has a grid on the backing paper so you can measure and cut it down to fit your project, however, there’s no grid on the tape itself.
I’ve tested this contact paper on both permanent and removable Cricut vinyl and it worked surprisingly well.
5. Use low tack paper tape
If you’re new to using a Cricut cutting machine, you may not know that there are different types of vinyl transfer tape available from other manufacturers (not Cricut).
Check out the low-tack paper kind of transfer tape.
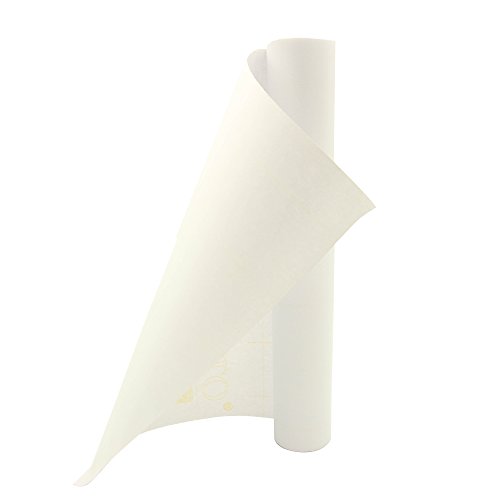
Paper transfer tape has a weaker adhesive and is less likely to tear your vinyl.
This type of tape is pretty easy to work with and will not leave behind any residue.
Paper transfer tape is an adhesive material that looks like large masking tape and comes in rolls without a liner.
It’s also used to transfer vinyl decals and other materials to surfaces.
You may be disappointed to find that the tape isn’t clear.
However, you can still see through it enough to easily line up your project.
With a little practice, you’ll be able to get the perfect alignment every time.
Another downside of it is that it doesn’t have a grid.
6. Make sure the vinyl decal sticks well before pulling away transfer tape
If you don’t take the time to make sure the decal stays on the surface well enough, you run the risk of it peeling.
So you’ll end up with a bunch of pieces of vinyl still stuck to the transfer tape instead of your project.
If you’re trying to apply a vinyl decal and having trouble getting it to adhere, there are a few things you can do to make it easier:
- First, you can rub down the decal with a scraper or a credit card.
This will help the decal adhere.
- You can also try heating the decal with a hair dryer.
Here’s how it works:
- First, again, make sure the surface you’re applying the decal to is clean and dry.
- Next, apply the decal to the surface using transfer tape.
- Then, take your hair dryer and turn it on to the highest setting.
- Hold the hair dryer about 6 inches away from the decal and move it around until the entire decal is warm.
- The heat from the hair dryer will help the adhesive on the back of the decal stick to the surface better.
- Just make sure you don’t hold the hair dryer too close to the decal because you can damage it.
- After that, wait for a few minutes before removing the tape.
- Once the decal is in place, slowly peel away the sticky transfer tape. If the decal starts to come up with the tape, stop and press it back down.
7. Use a different brand of transfer tape
You can also try using a different brand of regular grip transfer tape.
There are a lot of different tape brands out there, and each one has its unique properties.
Some are stickier than others, and some are more durable.
Experimentation is the key to finding the right material for your project.
8. Reuse your transfer tape a few times
If you find that your transfer tape for Cricut vinyl is too sticky, you can reuse it a few times and it will become less tacky.
Keep in mind that it won’t be as strong as it was when you first applied it, but it will still be usable.
What is the easiest way to peel away sticky transfer tape?
For some Cricut crafters, one of the most annoying parts of the process is trying to get the transfer tape off of the vinyl.
Here are some tips to help you peel away the sticky transfer tape and get a perfect result every time:
- To remove the tape from your vinyl, start at a corner and slowly peel the transfer tape away from the decal.
- Continue peeling the tape back, using your fingers to help separate it from the vinyl.
- If the vinyl sticks to the transfer tape, slowly lay the transfer tape back down and rub the vinyl with your fingers or a credit card.
- If the transfer tape is stubborn and not peeling away easily, use a utility knife or scissors to gently score the tape. This will help break the seal between the tape and the vinyl.
- Also, if you’re still having trouble, start by heating the tape with a hair dryer set to low heat. This will help to loosen its adhesive.
- Next, slowly peel the tape away from the vinyl again, being careful not to damage the vinyl.
- Once the transfer tape is completely removed, enjoy your beautiful vinyl design!
How to get the sticky residue from the transfer tape off Cricut vinyl?
Overly tacky transfer tape can sometimes leave behind a sticky residue.
Luckily, there are a few simple steps you can follow to get the residue off and leave your vinyl decal in great condition:
- You can use a piece of masking tape to remove it.
- Another way is to use a damp cloth to wipe away the residue.
- Alternatively, you can use a cotton swab dipped in rubbing alcohol to clean it off.
- If the residue remains after that, you can try using a hairdryer on low heat to loosen it up.
- Or use a bit of mineral oil or baby oil to break it down.
- If the residue is still stubborn, you can try using a product like Goo Gone to remove it.
When it comes to working with vinyl, one of the most important tools you’ll need is transfer tape.
This tape is what allows you to transfer your design from the vinyl backing paper to your project surface.
However, one of the downsides of transfer tape is that it can be too sticky.
Following the tips in this guide will help you use transfer tape like a pro.