Infusible Ink is a popular way to customize all sorts of things like t-shirts and bags. This heat transfer material is a breeze to work with, and the results are simply amazing. Plus, your designs will last for so long, even after multiple washes. But in order to get started, you need to know how to correctly place your Infusible Ink on your Cricut mat.
In this blog post, we’ll walk you through the step-by-step process, so you can become a pro at placing your Infusible Ink on your Cricut mat.

Infusible ink sheets overview
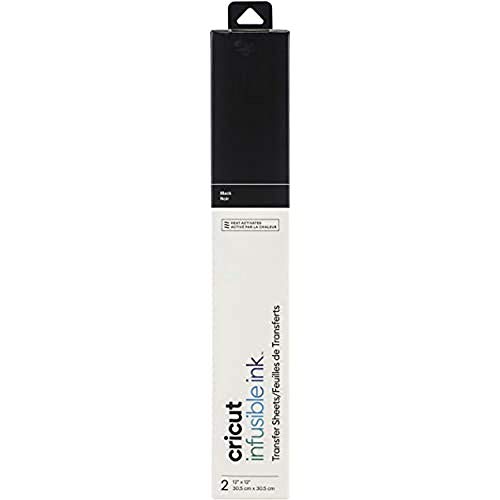
An infusible ink sheet is a special sublimation material.
You can kiss cut any design or text on it using Cricut.
Then you can transfer this design onto a wide range of compatible surfaces, such as polyester-based fabrics and coated ceramics, using heat and pressure.
Infusible inks fuse into the surface of the material, creating a permanent bond that will not peel, crack, or fade over time.
This results in vibrant, long-lasting sublimation art that looks and feels like it’s a part of the material itself.
Infusible ink sheets are available in a wide range of colors and patterns.
They can be used in tons of projects, from t-shirts and bags to coasters and mugs.
When used correctly, infusible ink sheets can help you create professional-looking projects that you can sell or give to your loved ones as gifts.
Why you should place infusible ink on the mat correctly
Placing infusible ink on the mat correctly is super-important for creating high-quality projects.
The sheet must be carefully aligned for cutting.
Plus, you need to make sure the right side is cut.
Each sheet of infusible ink has two sides.
One side is the liner and the other side contains the actual ink.
When you’re using your Cricut, you only need to kiss cut the ink side and avoid cutting the liner side.
If you position your infusible ink on the mat just right, you’ll be able to nail that first cut and save yourself some precious time and materials
How to place infusible ink on the mat correctly
1. Place it on the right mat
You should use the StandardGrip Cricut mat with infusible ink.
This grip level will help the ink sheet adhere properly to the mat.
So it won’t shift during the cutting process, and you’ll be able to remove it easily when you’re done.
2. Clean the mat before placing the ink sheet
Before placing the infusible ink sheet on the mat, clean the surface of the mat with a lint roller or a piece of tape to remove any debris or dust.
Unwanted lint or particles can make the ink sheet shift or the cutting blade skip.
If the mat is very dirty, you can wash it with warm water and a mild soap.
Then rinse it thoroughly and let it air dry completely before using it again.
3. Place the ink sheet the right side down
When placing your infusible ink sheet on the mat, always make sure to place it liner-side down with the ink side facing up.
This way the ink will later transfer onto your project instead of staining the mat.
Plus, you won’t accidentally cut the liner.
4. Align the sheet properly
When positioning the infusible ink sheet on the mat, take your time to align it properly.
Use the grid lines on the mat to help guide your placement.
5. Smooth it down with a brayer
Once you’ve placed the sheet on the mat, use a brayer tool to smooth out any bubbles or wrinkles.
This will create a good contact between the sheet and the mat.
Tools and supplies you’ll need
Here is a detailed list of everything you’ll need to get started:
1. StandardGrip Cricut mat
A standard grip mat is ideal for infusible ink projects.
Use a clean and fresh mat.
2. Infusible ink sheet
Choose the color, pattern, and finish of your choice.
3. Brayer tool
A brayer tool is a roller that helps to smooth out any bubbles or wrinkles in your infusible ink sheet so that it sticks to the mat well.
4. Lint roller or tape
Use a lint roller or a piece of tape to clean the sticky surface before you place your infusible ink sheet on the mat.
This helps to remove any debris or dust that reduce the mat’s adhesive properties.
How to place infusible ink sheet on a Cricut mat step-by-step
Here is a step-by-step guide on how to properly place an infusible ink sheet on a Cricut mat:
1. Prepare the mat
Check if the mat is clean and free of any debris.
To avoid any potential interferences with the cutting process, make sure to run a lint roller over the mat to remove any fibers, dust, debris, lint, or glitter left over from previous projects.
Wash the mat with a clean damp lint-free cloth and mild dish soap.
Let it air dry.
2. Place the ink sheet on the mat correctly.
Choose your infusible ink sheet and place it liner-side down on your clean and dry StandardGrip mat.
Align the sheet with the top left corner and the grid lines of the mat.
3. Smooth the infusible ink sheet on the mat
Use a brayer tool to smooth out any bubbles, wrinkles or air pockets between the sheet and the mat to ensure good contact.
4. Load the mat into the machine, cut, weed, and press your design
Once you’ve placed the infusible ink sheet on the mat and smoothed it out, it’s time to load the mat into the machine.
Follow the prompts in the Design Space software to cut your design.
Once the cutting process is finished, carefully weed the excess material from the ink sheet.
Finally, use a heat press, Cricut EasyPress, or mug press to transfer the design onto your project.
Follow Cricut’s and the blank manufacturer’s instructions for the specific materials you are using.
Can I place multiple infusible ink sheets on one mat?
No, it’s not recommended to place multiple infusible ink sheets on one mat.
This can cause them to shift during the cutting process.
So you’ll get a crooked design with bad edges and details.
Can I use my Cricut mat with different types and brands of infusible ink sheets?
Yes, you can use your StandardGrip Cricut mat with any type of infusible ink sheet, no matter what brand it is.
How do I remove my finished infusible ink project from the Cricut mat?
Once your design has been cut, gently remove it from the mat.
Do it by placing it face down on a flat surface and curving the mat away from the project.
If the project is still stuck the mat, try to loosen the edges and small details of your project with a spatula.
Then bend the mat slightly more to release the project.
How do I clean my Cricut mat after using infusible ink?
Use a lint roller or a piece of tape to remove any excess debris.
If the mat is very dirty, you can wash it with warm water and a mild soap, then air dry it.
Can I use a different brand of mat with my Cricut machine?
Yes! Even though Cricut recommends using their branded mats with your Cricut machine for the best results, there are many great off-brand alternatives on the market.
In case you opt for a mat from a different brand, make sure to verify its compatibility with your machine and its appropriate level of adherence for your project.
Can I reuse my Cricut mat?
Yes, you can reuse your Cricut mat many times.
However, the stickiness of the mat will eventually wear out, and it will need to be replaced after about 50 uses.
How do I store my Cricut mat?
Store it flat or hanging and away from direct sunlight and extreme temperatures.
Plus, use a protective cover to prevent dust and debris from sticking to the surface.
How do I prevent my infusible ink sheet from shifting during the cutting process?
To prevent shifting, check if you’re using the right mat.
The StandardGrip mat is the best one for most types and brands of infusible ink.
A lower grip mat can cause the material to shift.
Also, make sure the infusible ink sheet is flat and smooth on the mat.
Use a brayer or a scraper tool to help the sheet stick to the mat better.
Also, check if the blade is properly inserted and not dull, as this can also cause shifting during the cutting process.
I hope this guide has been helpful to you in learning how to properly place infusible ink on your Cricut mat.


